Petri Dice: How to Get Those Swirling Ink Tendrils Every Time
Step-by-step petri dice technique with exact ink drops, white pigment ratios, and pressure settings. Fix muddy colors, sinking ink, and missing blooms.
Contents
Everyone tells you petri dice are an “intermediate” technique. That you need to master basic pours first. That you should work your way up to them slowly.
They’re wrong about the timeline — but right about everything else.
Petri dice are one of the most visually striking dice making techniques you can learn, and the actual pour takes less than five minutes. The problem is that those five minutes involve chemistry you can’t fully control, ink behavior that changes with room temperature, and a white pigment drop that either makes the entire pour or turns it into an expensive marble. I’ve ruined more petri sets than I’ve nailed, and I still pour them every week because when the bloom hits right, nothing else in resin dice comes close.
Here’s the full technique — materials, exact steps, the failures you’ll encounter, and the fixes that actually work.
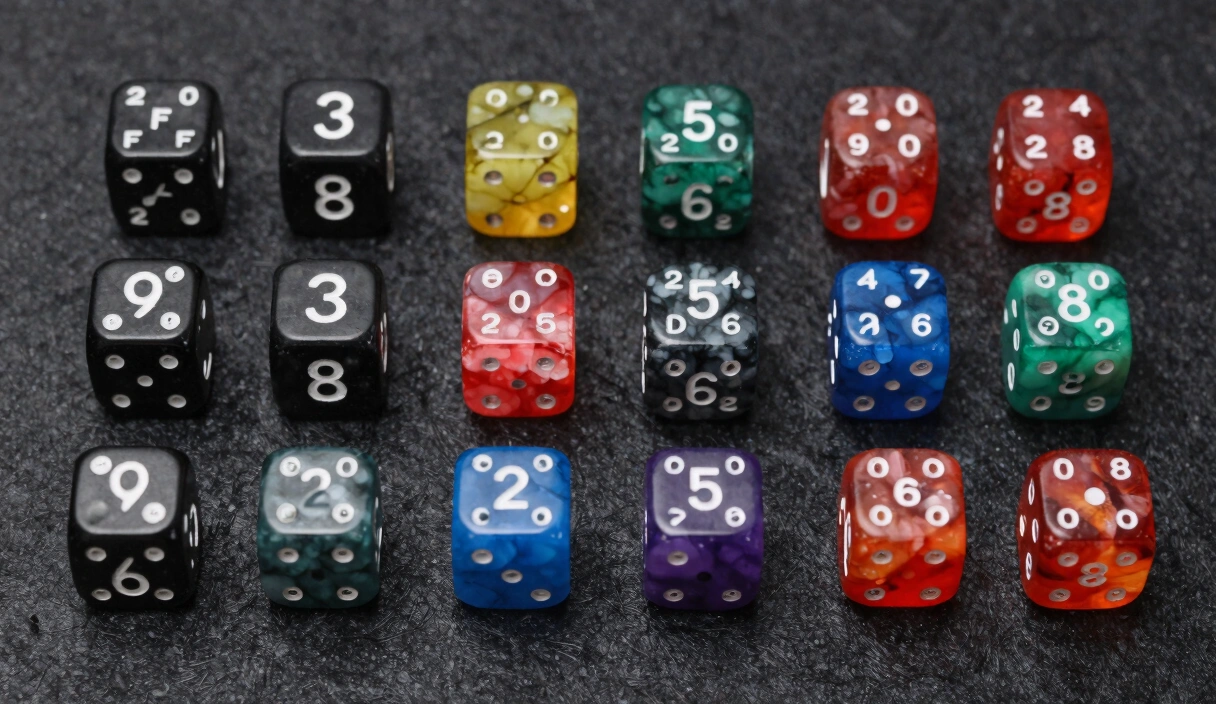
What Makes Petri Dice Unique
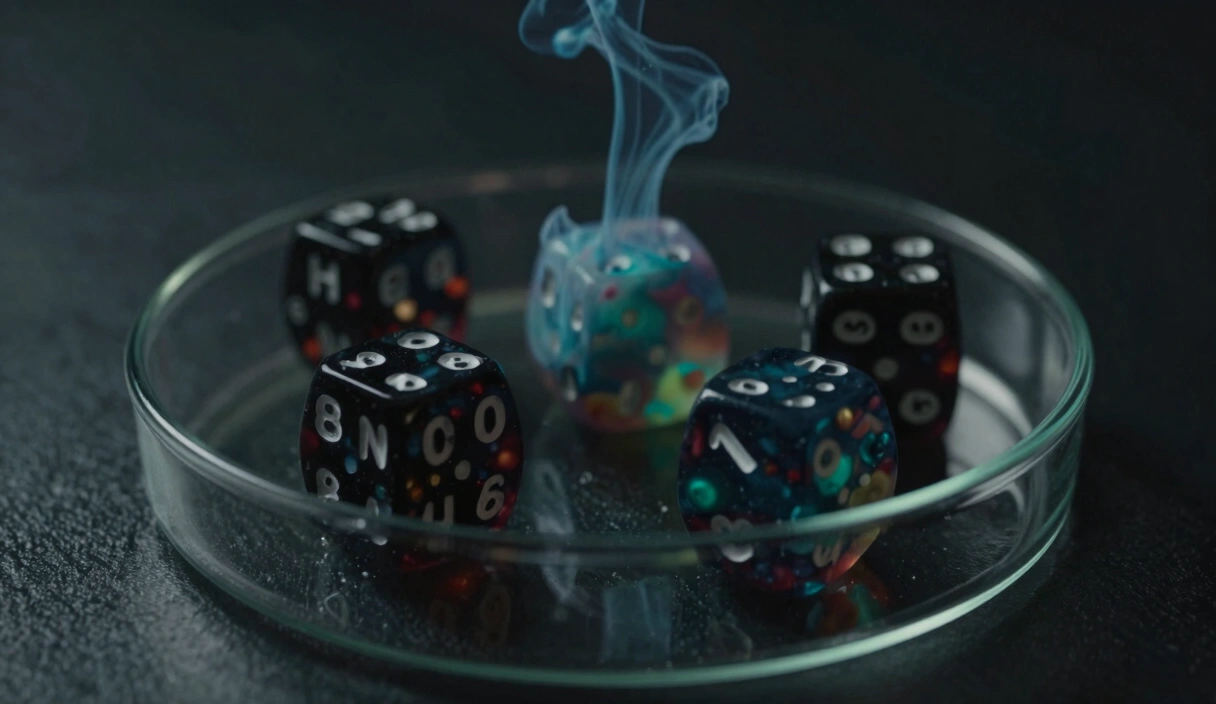
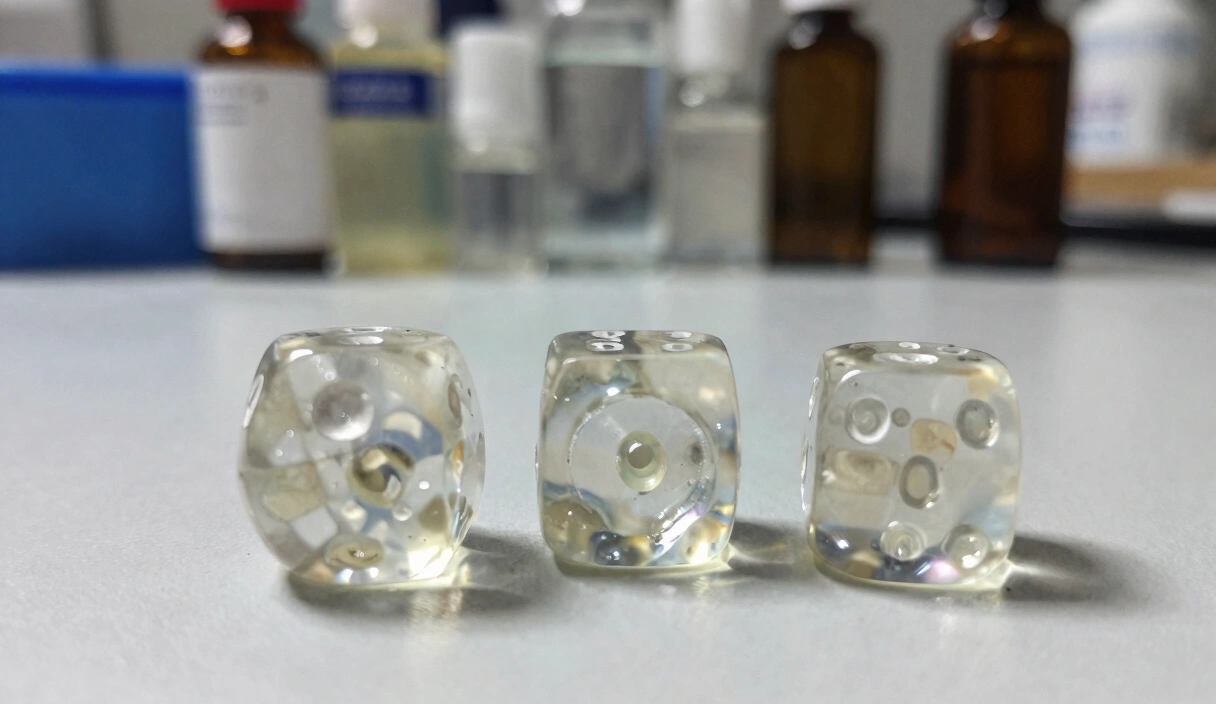
The name comes from the visual similarity to bacterial cultures growing in a petri dish. Those organic, branching tendrils of color suspended in clear resin? That’s not paint, and it’s not some layering trick. It’s a density reaction between alcohol ink, white pigment, and uncured epoxy resin.
Alcohol ink is lighter than resin. When you drop it onto the surface, it doesn’t just sit there — it sinks slowly, spreading into thread-like tendrils as it descends through the medium. The white pigment is the catalyst for the drama. It creates a visible “bloom” — a cloudy, cell-like structure that pushes the colored ink outward into those distinctive organic shapes.
Without the white pigment, you just get colored streaks. Pretty, maybe, but not petri. The bloom is the whole trick.
What makes this technique addictive — and honestly a little maddening — is that no two pours are identical. You can use the same inks, the same resin, the same mold, and get completely different patterns. The resin’s temperature, the drop placement, even the humidity in your workshop all influence the final result. I once poured two identical sets side by side, same everything, and one came out with gorgeous deep-sea tendrils while the other looked like someone sneezed into a cup of milk.
That unpredictability is the point. Each set is genuinely one of a kind.
Materials You Need for Petri Dice
Get specific materials. Generic “alcohol ink” from the craft store bargain bin won’t behave the same way, and the wrong resin viscosity will kill the effect before you even reach the pressure pot. Here’s what works.
Resin
Unicone Art Epoxy or Art ‘N Glow — both are casting resins formulated for dice. You need a clear, low-viscosity formula. Coating resins (the kind used for bar tops) are too thick and set too fast for the ink to develop tendrils. If you’re still deciding on a resin and building your dice making supplies list, either of these will serve you well beyond petri pours.
Unicone cures fully in 24 hours and demolds cleanly. Art ‘N Glow needs a full 72 hours before demolding, but some makers prefer its slightly higher viscosity for controlling ink flow. Both work. Pick one and stick with it until you understand how it behaves.
Alcohol Inks
Ranger Tim Holtz Alcohol Inks are the community standard. Wide color range, consistent behavior across batches, and they’re available everywhere. Start here.
Jacquard Pinata Alcohol Inks are more vibrant and produce more dramatic tendrils — but they’re harder to control. The higher pigment concentration means one extra drop can overwhelm the pour. I save these for sets where I want a single bold color against white.
Maker’s Note: I burned through three bottles of craft-store alcohol ink before someone on r/DiceMaking pointed out that not all alcohol inks have the same dye concentration. Ranger Tim Holtz and Jacquard Pinata are formulated for art applications — their pigment load and alcohol base are consistent enough to produce repeatable results. The cheap stuff is a dice lottery, and not the fun kind.
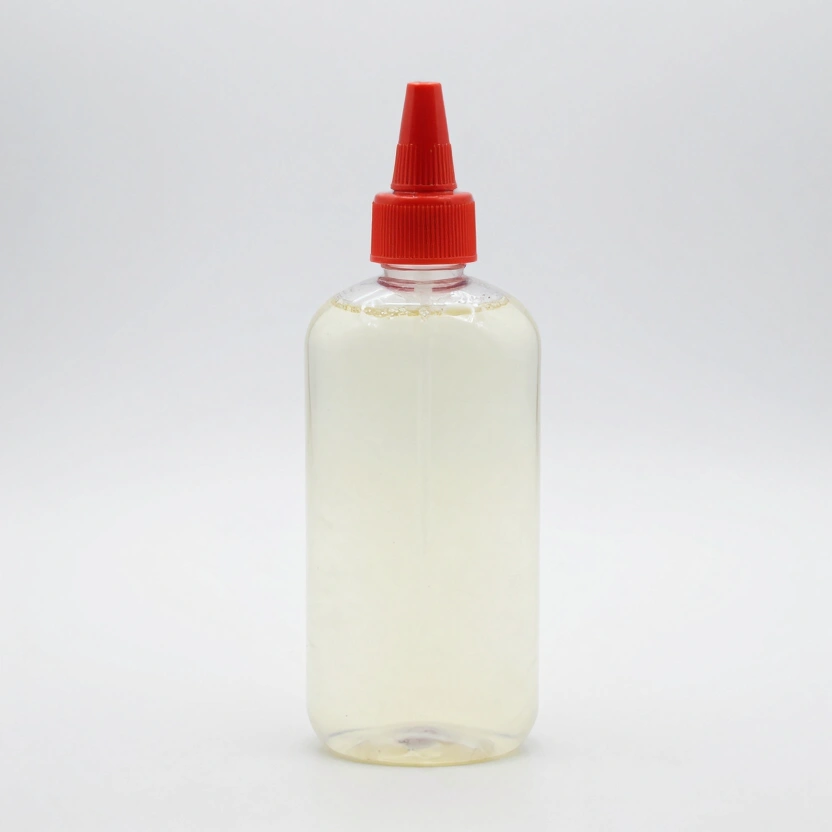
White Pigment
This is the ingredient that separates a petri pour from a colored-ink pour. You need white alcohol ink (Ranger Tim Holtz Snow Cap or Jacquard Pinata Blanco) or white pigment paste thinned with isopropyl alcohol.
The white creates the bloom. Without it, your colored inks will sink through the resin and settle in faint wisps at the bottom of the mold. With it, the white layer acts as a density barrier that forces the colored ink to branch and spread as it descends. The interaction between the two is what produces those cell-like structures.
Other Supplies
- Pipettes or eye droppers (one per color — cross-contamination kills clean petri effects)
- Toothpicks (for guiding ink placement, not stirring)
- Nitrile gloves and P100 respirator
- Digital scale (0.1 g accuracy)
- Silicone dice molds
- Pressure pot rated to 40 PSI or higher
- Infrared thermometer (optional but useful for checking resin temperature)
Step-by-Step Petri Technique
This is a Stage 3 technique. If you haven’t poured basic dice before, go learn how to make dice with a solid-color pour first. You need to be comfortable with resin mixing ratios, pressure pot operation, and demolding before you add alcohol ink variables to the equation.
Ready? Good. Here’s the exact process.
Step 1: Mix Clear Resin
Measure your Part A and Part B by weight at the manufacturer’s specified ratio. For Unicone, that’s 100:84 by weight. Stir slowly for 3 to 4 minutes, scraping the sides and bottom of your mixing cup. No colorant in the base — you need full optical clarity for the petri effect.
Safety First: Always work in a ventilated space with a P100 respirator. Alcohol ink fumes on top of resin fumes will give you a headache that lasts longer than your cure time.
Step 2: Warm Your Resin (Optional but Recommended)
Here’s a detail that separates okay petri pours from exceptional ones. Warm your mixed resin to approximately 85 degrees Fahrenheit (29 degrees Celsius) by placing the mixing cup in a warm water bath for 2 to 3 minutes. Warmer resin has lower viscosity, which means your ink tendrils can develop more complex branching patterns as they sink.
Don’t exceed 95 degrees Fahrenheit. Too hot and the resin starts curing faster, and you’ll get a half-developed bloom trapped in hardening epoxy. That’s not petri — that’s a frozen accident.
Step 3: Pour Resin into Molds
Fill each mold cavity to roughly 90% capacity. You need a small air gap at the top for the ink drops and your final resin top-off. Pour slowly and steadily — sloshing introduces micro-bubbles that will show up as white specks in your clear resin.
Step 4: Drop Alcohol Ink
Using a pipette, add 1 to 2 drops of your chosen alcohol ink color onto the resin surface. Maximum 3 colors per die. More than that and the colors blend into mud during the bloom reaction.
Drop placement matters. Aim for the center of the resin surface. If you’re using multiple colors, space them slightly apart — touching drops will blend at the contact point.
One to two drops per color. That’s it. The instinct to add more is strong. Fight it. Alcohol ink is intensely concentrated, and the bloom effect amplifies visual impact. Two drops of Ranger Tim Holtz Stream (teal) will produce dramatic tendrils throughout the entire die. Five drops will produce a solid teal die with no visible petri effect at all.
Step 5: Add the White Pigment Drop
This is the step that makes or breaks the pour.
Add a single drop of white alcohol ink or thinned white pigment paste directly onto or very near your colored ink drops. One drop. Watch what happens — the white will begin spreading immediately, pushing the colored ink outward and downward in branching tendrils.
The bloom starts within 30 seconds. The white pigment is denser than the alcohol ink but interacts with the resin surface differently, creating that characteristic cell structure. The colored ink gets pushed into the spaces between the white cells, forming the organic, almost biological patterns that define petri dice.
If you want to guide the pattern slightly, use a toothpick to nudge ink placement in the first 10 to 15 seconds after dropping. Gentle, single-point contact only. Dragging or swirling will destroy the natural bloom formation.
Step 6: Top Off and Seal
Pour a thin layer of clear resin over the top to fill the remaining cavity space. Pour gently at the edge of the mold, not directly onto the ink — you don’t want to push the developing pattern around.
Step 7: Pressure Pot
Seal your pressure pot and bring it to 40 PSI. Not 30 — at 30, you’ll get visible micro-bubbles that look like dust trapped in the resin. Not 60 — you’ll blow the gasket and ruin your day. 40 PSI compresses any remaining air bubbles below the threshold of visibility.
Leave the pot sealed for the full cure time. 24 hours for Unicone, 72 hours for Art ‘N Glow. Opening the pot early to “check on it” releases pressure and lets compressed bubbles expand. Don’t do it. Walk away. Pour yourself a drink. Come back tomorrow.
There’s a specific kind of satisfaction in cracking open the pressure pot after a full cure, pulling a die from the mold, and seeing tendrils of deep violet and gold branching through crystal-clear resin like some kind of frozen nebula. That moment alone justifies the patience.
Troubleshooting Petri Pours
Petri dice have a higher failure rate than most techniques. Here’s what goes wrong and why.
Ink Sinks to the Bottom
Your resin is too warm or too thin. The ink drops through the resin instead of slowly descending with tendril formation. Solution: let your resin sit for 5 to 10 minutes after mixing before pouring. A slightly thicker consistency (around 75 to 80 degrees Fahrenheit rather than 85) gives the ink more resistance to push against.
Alternatively, your ink drops were too large. Big drops have more mass and sink faster. Use a fine-tip pipette and keep drops small — 1 to 2 drops, not a squeeze.
No Bloom Effect
You either skipped the white pigment, used too little, or your white pigment is old. Alcohol-based white inks can separate in the bottle — shake vigorously for 30 seconds before use. If the white drops onto the resin and just sits there as a flat disc, the alcohol has evaporated and left behind a clump of pigment particles. Replace the bottle.
The other common cause: your resin has already started to gel. If you mixed your resin more than 15 minutes ago (with a fast-curing formula), the surface may be too viscous for the bloom reaction to develop. Mix fresh, pour promptly.
Muddy Colors
Too many ink colors, too many drops, or colors that blend into brown. Red and green make brown. Blue and orange make brown. Stick to analogous colors (colors next to each other on the color wheel) or a single accent color against white.
The best two-color combinations I’ve found: teal and gold, purple and silver, blue and white alone (no second color — the bloom structure itself provides visual complexity).
Surface Dimples After Curing
Alcohol evaporates during the cure, leaving tiny craters where ink drops were placed on the surface. The resin top-off in Step 6 prevents this — but if you poured the top layer too thin, the evaporating alcohol can still create depressions. Solution: use a slightly thicker top-off layer, roughly 2 to 3 mm of clear resin above your ink layer.
If you’re seeing bubbles along with dimples, check out how to fix resin bubbles — the causes often overlap.
Advanced Petri Variations
Once you’ve nailed the basic petri pour and can produce consistent blooms, there’s a whole category of hybrid techniques worth exploring.
Layered Petri
Instead of a single ink-and-bloom application, pour the die in two or three layers. Pour clear resin to 40% capacity, add ink and white pigment, let the bloom develop for 60 seconds, then pour a second clear layer to 70% and repeat with different colors. The result is distinct petri patterns at different depths within the die, creating an almost three-dimensional effect when you hold it to the light.
The risk: inter-layer adhesion. If your first layer starts to gel before you pour the second, you’ll get a visible seam line inside the die. Work quickly — the entire layered pour should take under 8 minutes.
Galaxy-Petri Hybrid
Mix a small amount of fine glitter (0.008-inch hex-cut polyester) into your clear resin before pouring. The glitter particles scatter light like distant stars, and the petri bloom tendrils create nebula-like structures through the glitter field. Use dark ink colors — deep purple, midnight blue, black — for the most convincing cosmic effect.
Imperative Warning: Do not use chunky craft glitter. Fine-cut cosmetic-grade or resin-grade glitter only. Large glitter particles interfere with the bloom reaction and create visible lumps that no amount of sanding will fix.
UV-Reactive Petri
Swap your standard alcohol inks for UV-reactive alcohol inks (Sinful Colors and some Ranger Tim Holtz special editions carry UV-reactive variants). The dice look like normal petri in daylight but glow under blacklight with the tendril patterns still visible. The bloom still works the same way — UV reactivity doesn’t change the density interaction.
There’s something genuinely wonderful about handing someone a set of petri dice that look beautiful in normal light, then pulling out a UV flashlight and watching their expression change as the tendrils start glowing. It’s a party trick that never gets old at the gaming table.
Frequently Asked Questions
Can I use acrylic ink instead of alcohol ink for petri dice?
No. Acrylic ink is water-based and doesn’t interact with epoxy resin the same way. It tends to bead up on the surface rather than sinking and forming tendrils. Alcohol ink’s solvent base allows it to penetrate and disperse through uncured resin. Stick with alcohol ink — specifically Ranger Tim Holtz or Jacquard Pinata.
How many colors can I use in a single petri pour?
Practically, 1 to 3 colors. One color plus white pigment is the safest bet for clean, readable petri patterns. Two colors can work well if they’re analogous (blue and purple, red and orange). Three colors require very precise drop placement and restraint — 1 drop per color maximum. Beyond three, you’re almost guaranteed to get muddy blending.
Do I need a pressure pot for petri dice?
Yes. Petri pours in particular generate micro-bubbles where the alcohol ink contacts the resin. Without pressure, these bubbles rise through the bloom structure and create cloudy patches that obscure the tendril pattern. A pressure pot at 40 PSI is non-negotiable for clean petri results.
Why did my petri dice come out cloudy instead of clear?
Three likely causes. First, your resin ratio was off — even a 5% deviation in Part A to Part B ratio can cause incomplete curing and permanent cloudiness. Second, you used too much white pigment. The bloom is supposed to be a localized effect, not a full-die fog. One drop of white per die. Third, moisture contamination. If your workspace humidity is above 70%, moisture can react with uncured resin and cause a milky haze. Store your resin in a climate-controlled space and keep your lids sealed between uses.
Petri Dice Supplies
Art 'N Glow Epoxy Resin Kit (32 oz)
Crystal-clear 1:1 mix ratio epoxy. UV resistant, self-leveling. The community favorite for dice casting.
Check Price on Amazon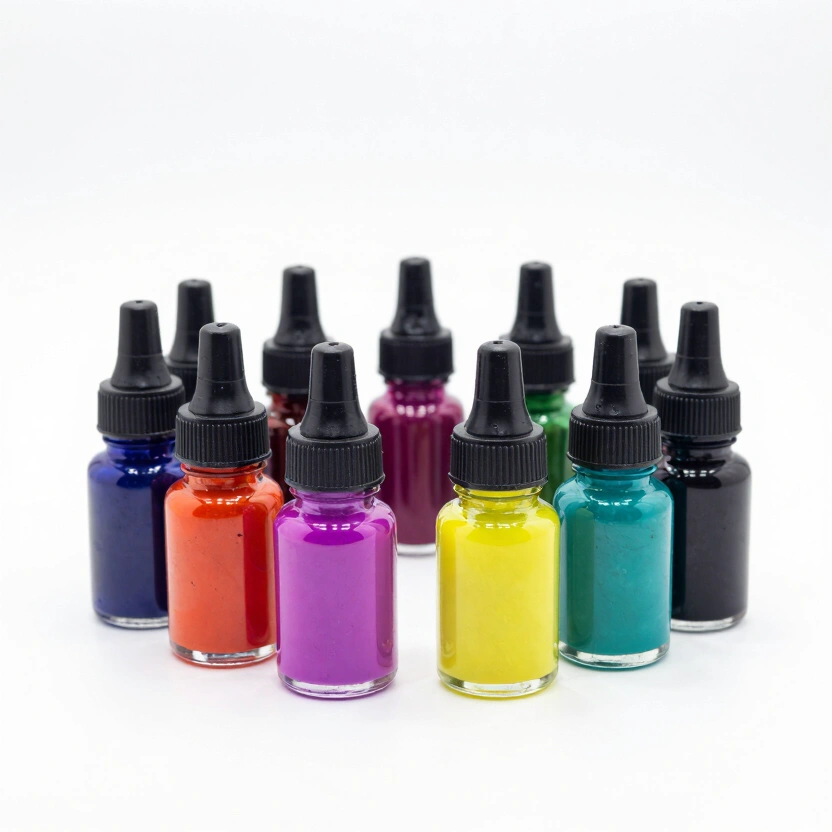
LET'S RESIN Chameleon Color-Shift Pigments
Intense color-shifting chrome powders for resin. Creates stunning multi-tone dice that change in light.
Check Price on Amazon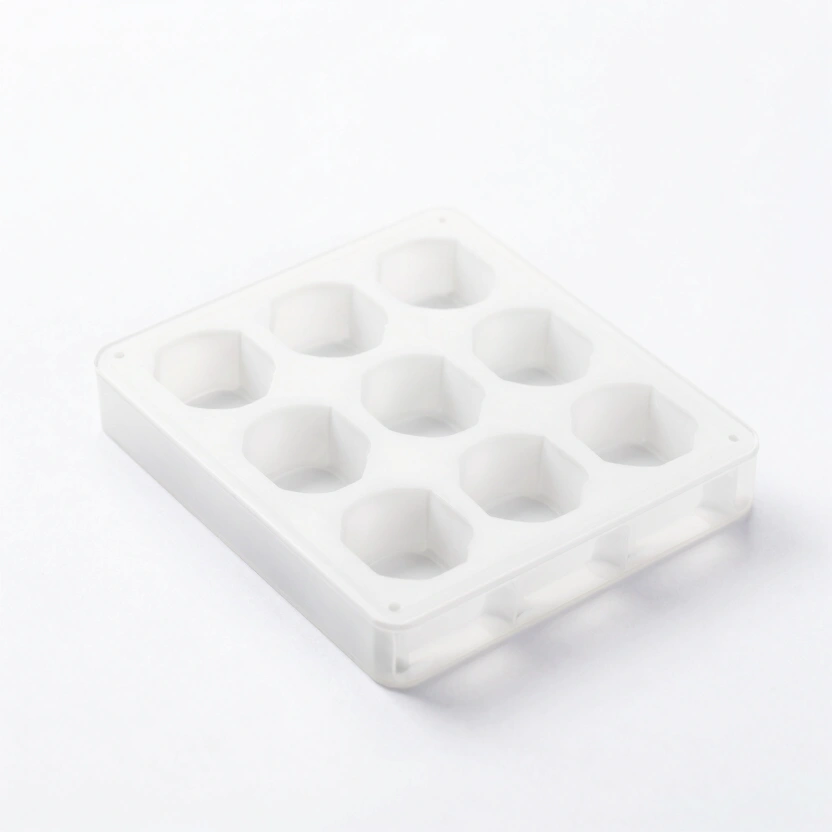
CZYY Sharp Edge Dice Mold (7 Shapes)
Precision slab-style molds for sharp-edge dice. Popular on r/DiceMaking. Requires careful demolding.
Check Price on Amazon* Affiliate links. Prices last updated March 6, 2026.
Petri dice are the technique I recommend most — and the one I’m most honest about its limitations. You will waste resin. You will produce sets where the bloom didn’t fire, where the ink sank before it could branch, where three beautiful colors turned into a color that can only be described as “regret.” That’s the trade-off for a technique built on controlled chaos. The chemistry does what it does, and your job is to give it the best possible conditions and then step back. Master the basics here, and the advanced variations — layered, galaxy, UV-reactive — become experiments rather than gambles.
Related Articles
Dice Making Techniques: 6 Methods from Basic Pours to Liquid Core
6 resin dice techniques ranked by difficulty with exact steps, materials, and failure points. Data from 200+ pours across petri, galaxy, inclusion, and liquid core methods.
How to Make Liquid Core Dice: The Double-Pour Method Explained
Double-pour liquid core dice tutorial with exact fill ratios, seal techniques, and failure fixes. 73% of first attempts leak — here's how to beat those odds.
Sharp Edge Dice: Why They Cost More and How to Make Them
Most dice makers overcomplicate sharp edges. The real secret is patience, flat surfaces, and knowing when to stop sanding. Here's the full process.