How to Make Dice: A Beginner's Complete Workshop Guide
Most dice-making tutorials skip the parts where things go wrong. This one starts there — covering every step from resin mixing to final polish with exact numbers.
Contents
Ever held a handmade resin die up to the light and wondered how someone trapped a tiny galaxy inside a piece of plastic? Here’s the secret most tutorials won’t lead with: your first set of dice will probably look terrible. Mine did. They had bubbles, uneven faces, and a sticky patch on the d20 that never fully cured because I eyeballed my resin ratio instead of using a scale.
That’s fine. Terrible first dice are the entrance fee. What matters is understanding the full process before you pour, so you make fixable mistakes instead of expensive ones.
This is the walkthrough I wish I’d had — every step from raw resin to finished polyhedral set, with the exact numbers, brand names, and timing that actually matter.
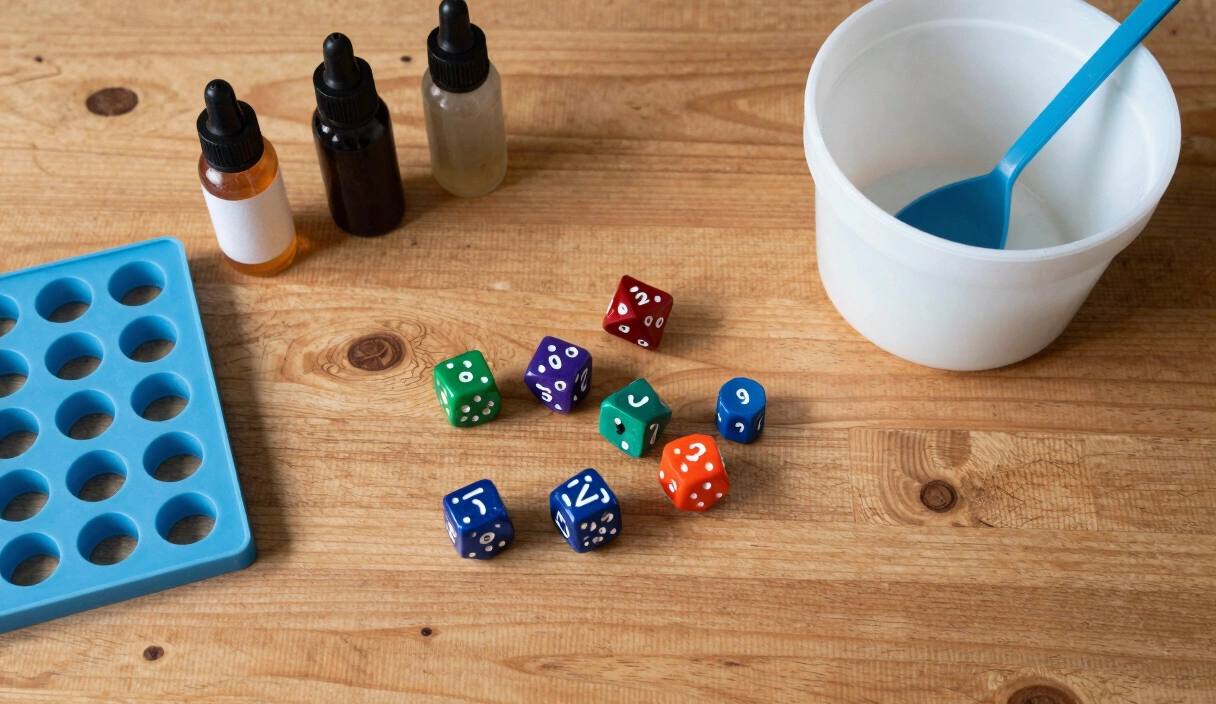
What You Need Before Your First Pour
You don’t need a professional studio. You need a flat surface, good ventilation, and the right supplies in the right order. If you want the detailed breakdown of every item and where to buy it, the dice making supplies guide covers that. Here’s the short version.
The essentials:
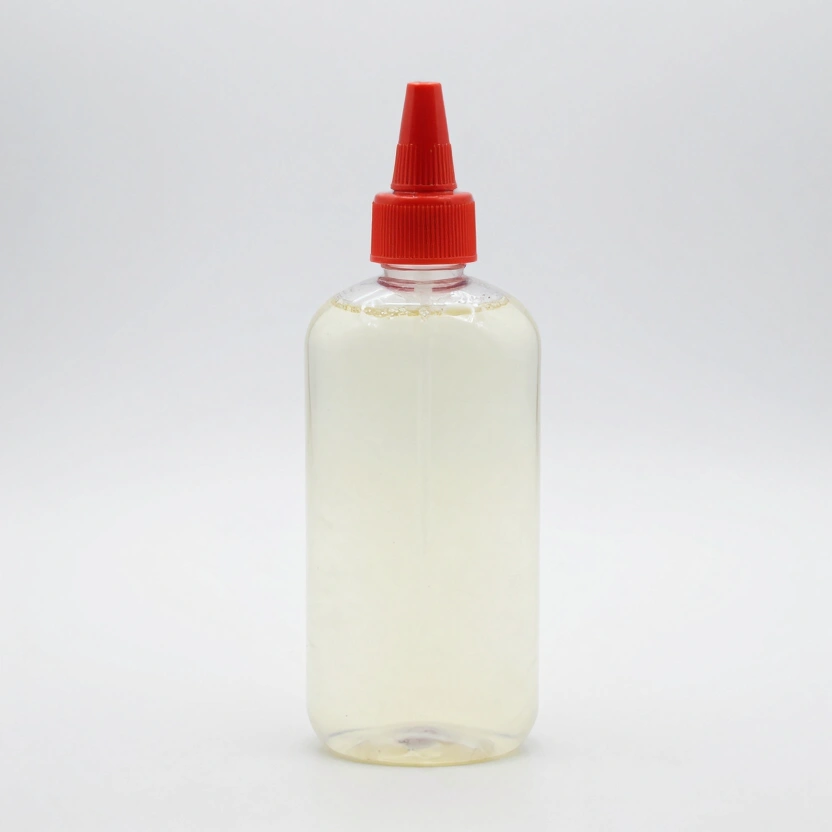
- Epoxy resin (two-part). Unicone Art Resin or Art ‘N Glow for your first batch — both mix at a 1:1 ratio by weight, which is more forgiving than 2:1 formulas.
- A silicone dice mold. Start with a sprue mold (single piece, pour hole at the top). NanoLabMaker makes reliable starter sets for $20-35.
- A digital scale accurate to 0.1 grams. Not a kitchen scale. A jewelry or postal scale, $10-20.
- Mixing cups and silicone stir sticks. Not popsicle sticks — wood grain whips air into resin and creates bubbles.
- Nitrile gloves and a 3M 6200 respirator with P100/OV cartridges. Resin is a skin sensitizer. One allergic reaction and you’re sensitized for life. This is not optional.
Strongly recommended:
- A pressure pot for resin. The Harbor Freight 2.5-gallon paint pot converted with new fittings is the standard. This is what eliminates bubbles. You can pour without one, but your dice will have visible bubbles.
- An air compressor rated to at least 90 PSI output.
- Colorants: mica powder, alcohol ink, or glow powder — depending on the effect you want.
Hey, you — yes, with your finger hovering over the “buy everything” button. Resist the urge to order a vacuum chamber, a rock tumbler, and Zona polishing papers on day one. Pour your first set with the basics. You’ll know what you actually need after you’ve held a die you made yourself, flaws and all.
Understanding Your Mold: Cap vs. Sprue
Before you mix a single drop of resin, you need to know which mold type you’re working with, because the pouring technique is different for each.
A sprue mold is a single block of silicone with a cavity shaped like your die and a pour channel (the sprue) at the top. You fill it, let it cure, and pop the die out. The sprue leaves a small stem of cured resin on one face that you’ll sand flush later. Sprue molds are cheaper, simpler, and the right choice for your first pour.
A cap mold is two pieces: a body and a lid. You pour the body, let it reach a partial cure (usually 4-8 hours depending on your resin and ambient temperature), then press the cap on to form the final face. Cap molds produce sharp-edge dice — the crisp, gem-like edges that sell for $80+ per set on Etsy. They’re also less forgiving. Cap too early and the resin squishes. Cap too late and the layers won’t bond.
For this walkthrough, I’ll assume you’re using a sprue mold. Once you’ve made your first few successful sets, cap molds are the natural next step.
Mixing Resin: Where Most First Batches Go Wrong
This is the step that determines everything downstream. A bad mix means sticky dice, cloudy dice, or dice that never cure at all. There is genuinely nothing you can do later to fix a bad mix.
Step 1: Measure by Weight
Set your digital scale to grams. Place your mixing cup on the scale and tare it to zero.
Pour Part A (resin) to your target weight. For a full 7-die polyhedral set in a sprue mold, 80-100 grams total mixed resin is typical. If your resin is a 1:1 ratio, that’s 40-50 grams of Part A.
Tare again. Pour Part B (hardener) to the same weight.
I poured my third batch 15 grams heavy on Part A because I got distracted. The result was a set of dice that felt like gummy bears for three days before finally hardening — and even then, the surface stayed tacky. A $12 scale prevents this. Use it every time.
Step 2: Stir Slowly for 3-5 Minutes
This feels tedious. Do it anyway.
Scrape the sides and bottom of your cup while stirring. Unmixed resin along the edges is the second most common cause of soft spots. Stir slowly and deliberately — fast stirring introduces air bubbles that even a pressure pot may not fully compress.
Set a timer. Three minutes minimum. Five is better. You’ll see the mixture go from streaky to uniformly clear.
Step 3: Add Color (If Using)
After mixing Part A and Part B, add your colorant.
Mica powder gives metallic and pearlescent effects. A little goes a long way — start with the tip of a toothpick’s worth and add more. Too much mica powder can actually interfere with cure and weaken the surface hardness of your dice.
Alcohol ink (Ranger Tim Holtz or Jacquard Pinata) creates the swirling petri-dish patterns you see all over Instagram. Drop it in and give one or two lazy stirs — don’t mix it thoroughly. The point is controlled chaos.
Glow powder (strontium aluminate based) makes your dice glow in the dark. Mix it in thoroughly, unlike alcohol ink. Glow powder is heavier than resin and will sink to the bottom of the mold during cure, so some makers pour in two stages, rotating the mold between pours.
I ruined my first petri dice by stirring the alcohol ink completely into the resin. The beautiful cell patterns I’d seen online require you to barely touch the ink with your stir stick. One full stir and it becomes a uniform, murky color. The restraint feels wrong. Do it anyway.
Pouring Into the Mold
With your resin mixed, colored, and ready, it’s time to pour.
Prep the Mold
Set your sprue mold on a level surface. I use a small spirit level — even a slight tilt means uneven faces and dice that won’t roll true. If your mold is new, no release agent is needed for silicone. After 15-20 pours, a light mist of mold release helps with demolding.
Pour Slow, Pour High
Here’s a trick that sounds counterintuitive: pour from 6-8 inches above the mold, in a thin stream.
The height stretches the resin stream thin, which breaks up air bubbles on the way down. A thick glug of resin from 2 inches up traps pockets of air inside the mold cavity. Slow and high beats fast and close every time.
Fill each cavity to just above the top of the sprue channel. Resin shrinks slightly as it cures — maybe 1-2% with epoxy — so a small overfill ensures your die face ends up flat after sanding.
If you see surface bubbles, a quick pass with a heat gun (not a lighter — open flame can scorch silicone molds) will pop them. Hold the heat gun 4-6 inches away and keep it moving.
The Pressure Pot Step
If you have a pressure pot: place the filled mold inside, seal the lid, and pressurize to 40 PSI. Not 30 — at 30 PSI, bubbles compress but remain visible as tiny specs. Not 60 — you risk blowing the pot’s seal and you gain nothing meaningful above 45.
Leave it pressurized for the full cure time of your resin. For most epoxy resins, that’s 24 hours minimum.
Do not open the pot to check on it. I know you want to. I opened mine at the 8-hour mark on my second batch because I was curious. Releasing and re-pressurizing mid-cure can cause bubbles that had been compressed to re-expand before the resin sets around them. Walk away. Do something else for a day.
If you don’t have a pressure pot, you can still make dice. They will have bubbles — that’s the reality. Some makers lean into it, using opaque colors and heavy mica loads to hide bubble artifacts. But if you’re serious about clear, bubble-free dice, a pressure pot is the single most impactful upgrade you’ll make. The pressure pot for resin guide walks through the Harbor Freight conversion step by step.
Curing: Patience Is a Material
Epoxy resin doesn’t dry — it cures through a chemical reaction between Part A and Part B. The reaction is exothermic (it generates heat), and the speed depends on ambient temperature.
At 72-77 degrees Fahrenheit (22-25 degrees Celsius), most dice epoxies reach demolding hardness in 24 hours and full cure in 72 hours. Below 65 degrees Fahrenheit, cure times can double. Above 85 degrees, the reaction accelerates and can cause yellowing or even cracking from thermal stress.
The resin curing temperature guide goes deeper on this, but the short version: keep your curing space between 70 and 80 degrees Fahrenheit, and don’t rush it.
How to tell when resin is cured: press a fingernail into the sprue (the pour channel stub). If it leaves an indent, it’s not ready. If your nail slides off without marking, you’re good to demold.
Demolding: The Satisfying Part
Flex the silicone mold gently and push the die out from the bottom. If it resists, work it slowly — forcing a die out of a sprue mold can tear the mold, and replacement molds cost $20-35.
Your die will have a sprue — a stem of cured resin sticking out from one face. It might also have flash, which is a paper-thin film of resin that seeped into the mold’s seam line. Both are normal. Both get removed in the next step.
There’s a moment, right here, that hooks people. You flex the mold, the die drops into your palm, and it’s real. It has weight and color and faces with numbers on them. Even if it’s cloudy, even if there’s a visible bubble on the d4, it exists because you made it.
That feeling is why the r/DiceMaking community went from 5,000 members to over 50,000 in under two years during the pandemic craft boom. Every maker remembers their first demold.
Finishing: From Rough to Rolling-Ready
Demolding gives you a raw die. Finishing turns it into something you’d actually bring to a game table.
Sprue Removal
Cut the sprue flush with the die face using flush-cut nippers or a hobby knife. Leave it slightly proud of the surface — you’ll sand the last bit flush. Cutting too deep gouges the face and creates a divot that’s hard to fix.
Sanding Progression
This is the grind. Literally.
Wet-sand through a grit progression: 400, 600, 800, 1000, 1500, 2000, 3000. Each step removes the scratches left by the previous grit and replaces them with finer ones. Sand wet — dry sanding generates heat that can cloud epoxy and clogs the paper faster.
Spend 30-60 seconds per grit per face on the sprue side. You’re not reshaping the die, just smoothing the surface where you removed the sprue and flash.
After 3000 grit, step up to Zona polishing papers if you want optical clarity. The Zona progression (equivalent to 4000-12000 grit) takes the surface from “smooth” to “glassy.” It’s the difference between dice that look handmade and dice that look professional.
A full sanding and polishing pass on a single die takes 15-30 minutes by hand. A full set of seven? Budget an hour or more. Some makers mount dice on a pottery wheel or drill press with a custom jig to speed this up, but for your first sets, hand-sanding teaches you what each grit level does.
Number Inking
Your mold leaves engraved numbers on each face. To make them readable, fill the engravings with acrylic paint.
Apply paint with a fine brush or paint pen — Citadel and Vallejo miniature paints work well because they’re designed for small, precise application. Let the paint dry for 10-15 minutes, then wipe the excess off the die face with a damp cloth or paper towel. The paint stays in the engraved channels and wipes clean from the flat surface.
Gold on dark resin. White on transparent. Black on light opaque. Those are the classic combinations, but this is your die — experiment.
Testing Your Dice
A beautiful die that rolls 14 more often than 7 is just a pretty paperweight.
The simplest balance test: fill a glass with water and add salt until the die floats. Spin it gently. If the same face always rotates to the top, there’s a density imbalance — usually an air bubble trapped on one side. The dice balance test guide covers the full method and what to do when your dice fail.
Perfectly balanced handmade dice are genuinely difficult. Factory dice are tumbled and trimmed by machines with tight tolerances. Your handmade dice will be close, but “casino-grade fair” isn’t a realistic benchmark for hobby resin dice. The goal is “no consistent bias” — and the salt water test catches the worst offenders.
Common First-Batch Problems (And What Actually Fixes Them)
Bubbles everywhere: You either stirred too fast, poured too fast, or didn’t use a pressure pot. Slow down your stir, pour from height, and get a pressure pot.
Sticky or soft spots: Off-ratio mix. Measure by weight, not volume, and stir for a full 3-5 minutes including the sides and bottom of the cup.
Cloudy resin: Moisture contamination. Store your resin in a dry place, cap bottles immediately after use, and don’t mix in humid conditions above 70% relative humidity.
Yellowing: Too much heat during cure or a resin formulated for coating rather than casting. Use a casting-specific epoxy, and keep your cure environment below 80 degrees Fahrenheit.
Uneven faces: Mold wasn’t level during cure, or you under-filled the cavity. Use a spirit level and slightly overfill.
Where to Go From Here
You’ve got the full loop now: mix, color, pour, cure, demold, finish. Each of those steps has depth you can spend months exploring — petri techniques with alcohol ink, sharp-edge dice with cap molds, liquid core dice with a two-stage pour, galaxy effects with layered mica.
But here’s an honest limitation: this guide gets you through your first set. It won’t get you to sellable quality on its own. Sellable dice require consistent pressure casting, mastery of sanding progression, and dozens of batches of practice. The gap between “I made a die” and “someone paid $60 for my die” is wider than any single tutorial can bridge.
That’s not discouraging — it’s freeing. Your first pour doesn’t need to be perfect. It needs to be done. Make the ugly set. Learn what went wrong. Make a less ugly set. Somewhere around batch five or six, you’ll pull a die from the mold and genuinely not believe you made it.
That’s the moment. Everything after it is refinement.
Dice Making Essentials
Art 'N Glow Epoxy Resin Kit (32 oz)
Crystal-clear 1:1 mix ratio epoxy. UV resistant, self-leveling. The community favorite for dice casting.
Check Price on Amazon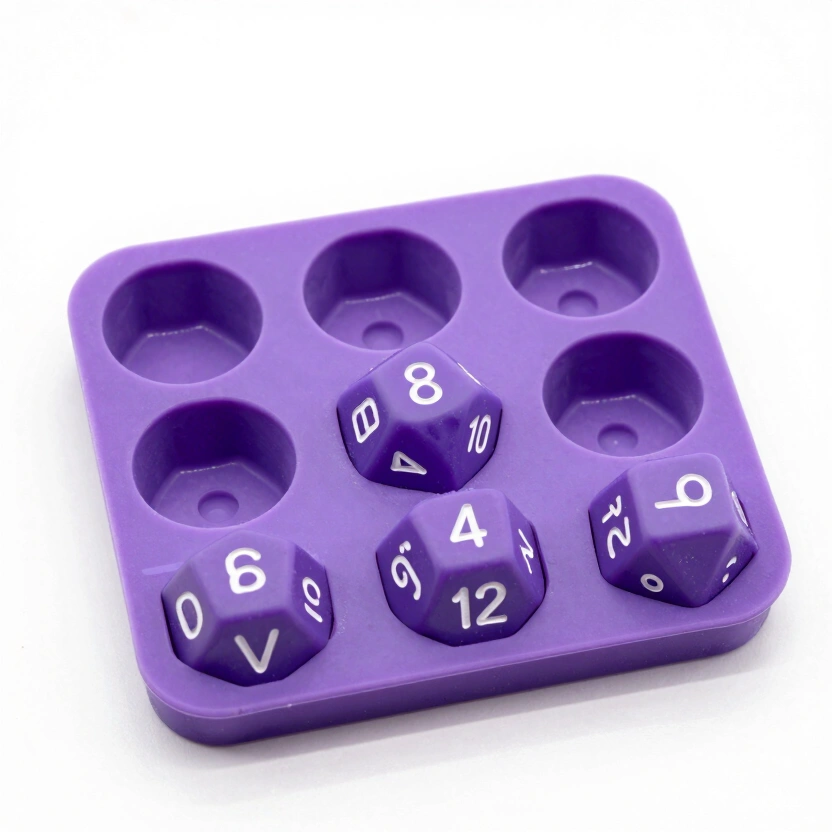
LET'S RESIN Polyhedral Dice Mold Set (7 Shapes)
Stereoscopic 7-piece silicone mold for D4-D20. Pre-made sprue channels. Top-selling beginner mold.
Check Price on Amazon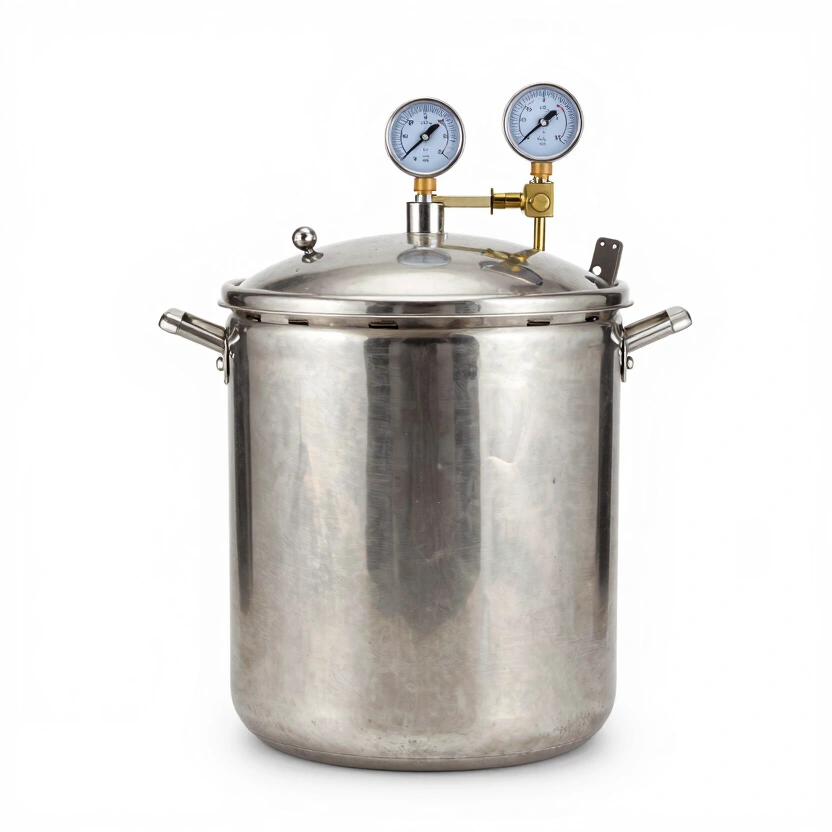
California Air Tools 255C Pressure Pot (2.5 gal)
Purpose-built for resin casting. Coated steel tank, portable. The #1 recommended pressure pot for dice makers.
Check Price on Amazon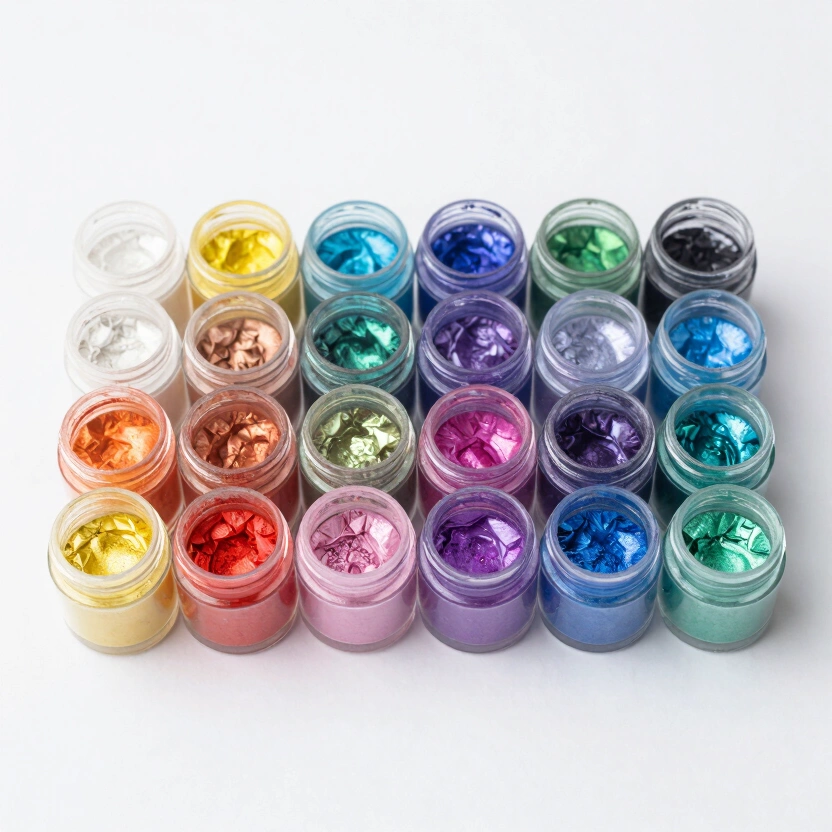
Eye Candy Mica Powder (24-Pack Sampler)
24 vibrant pearlescent pigments. A little goes a long way. Perfect for swirls, layers, and galaxy effects.
Check Price on Amazon* Affiliate links. Prices last updated March 6, 2026.
FAQ
How much does it cost to start making dice?
The absolute minimum is $35-50 for resin, a sprue mold, a scale, gloves, and a respirator. A setup that consistently produces good dice — including a converted pressure pot and air compressor — runs $150-250 total. See the full dice making supplies list for a tiered breakdown.
Can I make dice without a pressure pot?
Yes, but your dice will have visible bubbles. Opaque colors and heavy mica loads hide them reasonably well. If you want clear, bubble-free dice, a pressure pot is essential. The Harbor Freight 2.5-gallon paint pot conversion costs $80-120 including fittings and is the most common setup in the hobby. The pressure pot for resin guide covers the full conversion.
How long does it take to make a set of dice from start to finish?
Active work time is about 2-3 hours total: 20-30 minutes for mixing and pouring, plus 1-2 hours for sanding, polishing, and inking. But cure time adds 24-72 hours of waiting. A realistic timeline from pour to finished set is 3-4 days, with most of that being hands-off cure time.
What resin should a beginner use?
A 1:1 mix ratio epoxy resin. Unicone Art Resin and Art ‘N Glow are both popular beginner choices — they’re forgiving on mix ratio, have a reasonable working time of 30-45 minutes, and cure clear. Avoid polyurethane resins (faster cure but more brittle and less forgiving) and UV resin (better for repairs than full dice pours) until you have experience with epoxy.
Are handmade resin dice balanced enough for fair play?
Most handmade dice are balanced enough for casual TTRPG play, which is what they’re designed for. They’re not casino-grade — no handmade resin die is. The salt water float test catches significant imbalances, and pressure casting dramatically reduces the internal bubbles that cause bias. For a game of D&D, well-made resin dice are more than fair enough. The dice balance test guide explains the testing method in detail.
Related Articles
Best Resin for Dice Making: 5 Brands Tested and Ranked
I poured dice with five different resins so you don't waste money guessing. Honest pros, cons, and a clear winner for every budget.
DIY Dice Tower: 4 Builds from Cardboard to Resin
Four dice tower builds ranked by skill and budget — from a free cardboard tower in 30 minutes to a resin masterpiece that matches your handmade dice set.
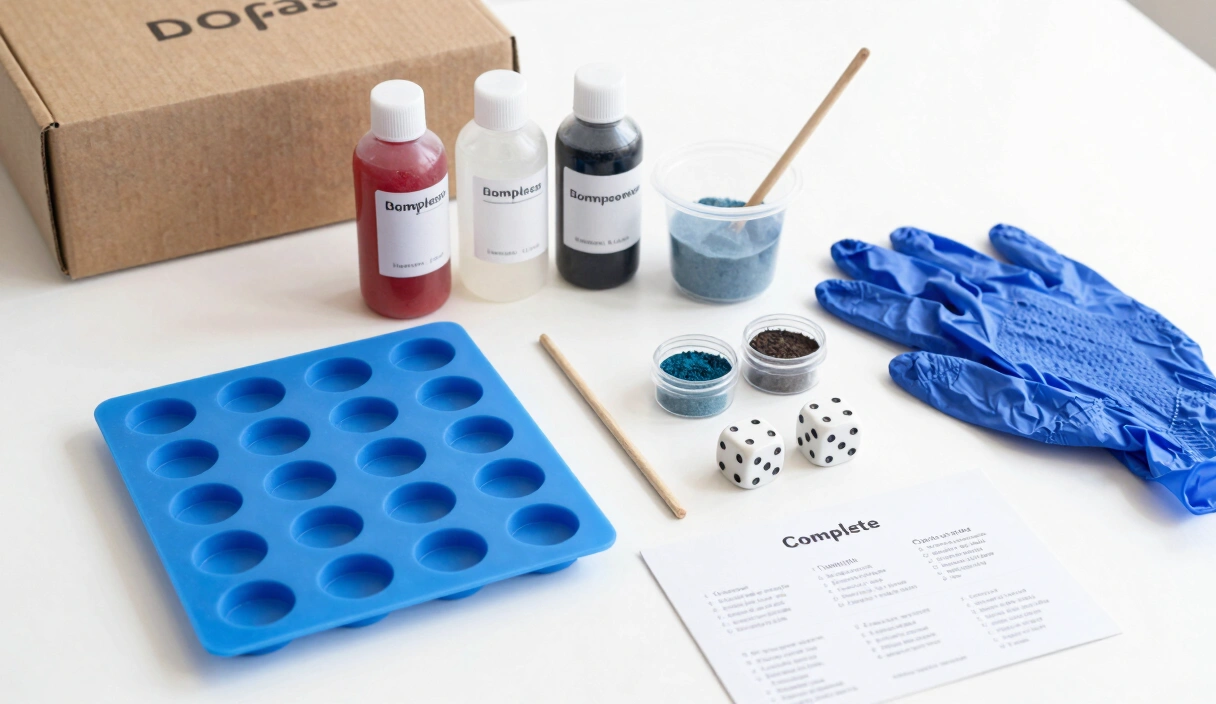
Dice Making Kits: Why Most Are a Waste of Money (and the One Exception)
Most dice making kits sell you $15 of supplies in a pretty box for $50. Here's what they leave out, what to buy instead, and the one time a kit actually makes sense.