Dice Making Supplies: What You Actually Need (And What Can Wait)
48.7 million search results tell you to buy everything. Here's the tiered breakdown showing exactly what you need first, what can wait, and how to start making dice for under $50.
Contents
In 1974, Gary Gygax launched Dungeons & Dragons with a problem: the game required polyhedral dice — d4, d8, d12, d20 — that almost no one in America had ever seen. Players who wanted to try the new game had one option. They mail-ordered from a single supplier in Hong Kong, then waited weeks or months for a set to arrive. The shortage lasted years.
That scarcity planted the seed. Why wait for someone else to make your dice when you could make them yourself?
Today you can order every supply you need in 48 hours from Amazon. The scarcity is gone, replaced by a different problem: there are so many options, so many YouTube setups, so many r/DiceMaking wishlists, that most beginners buy either too much or the wrong things entirely. Their first supply order looks impressive and makes mediocre dice.
This is the list that cuts through that. Three tiers, honest costs, and a clear upgrade path.
The Three-Tier Supply List
Before naming a single product, here’s how to think about dice making supplies:
Tier 1: You cannot make dice without these. If it’s missing from your setup, you get nothing.
Tier 2: This is what separates cloudy dice from clear ones. You can technically make dice without these, but you probably won’t make dice worth keeping.
Tier 3: Upgrade tools. Buy these after your first three or four successful pours. Not before.
Budget Reality: The absolute minimum for a first pour is $35-50. A functional starter setup that produces consistently decent dice runs $80-120. Bubble-free, clear dice on demand? Budget $200-280 total once you’ve added a pressure pot. Most beginners end up spending $150-200 anyway — usually by buying tier-3 tools before they need them and buying cheap tier-1 supplies twice.
I bought a $40 UV lamp before I’d poured my first die. It sat in a drawer for two months. Meanwhile my first batch of dice looked like someone had frozen a glass of soda water. The lamp wasn’t the problem. I didn’t have the right things on the list below.
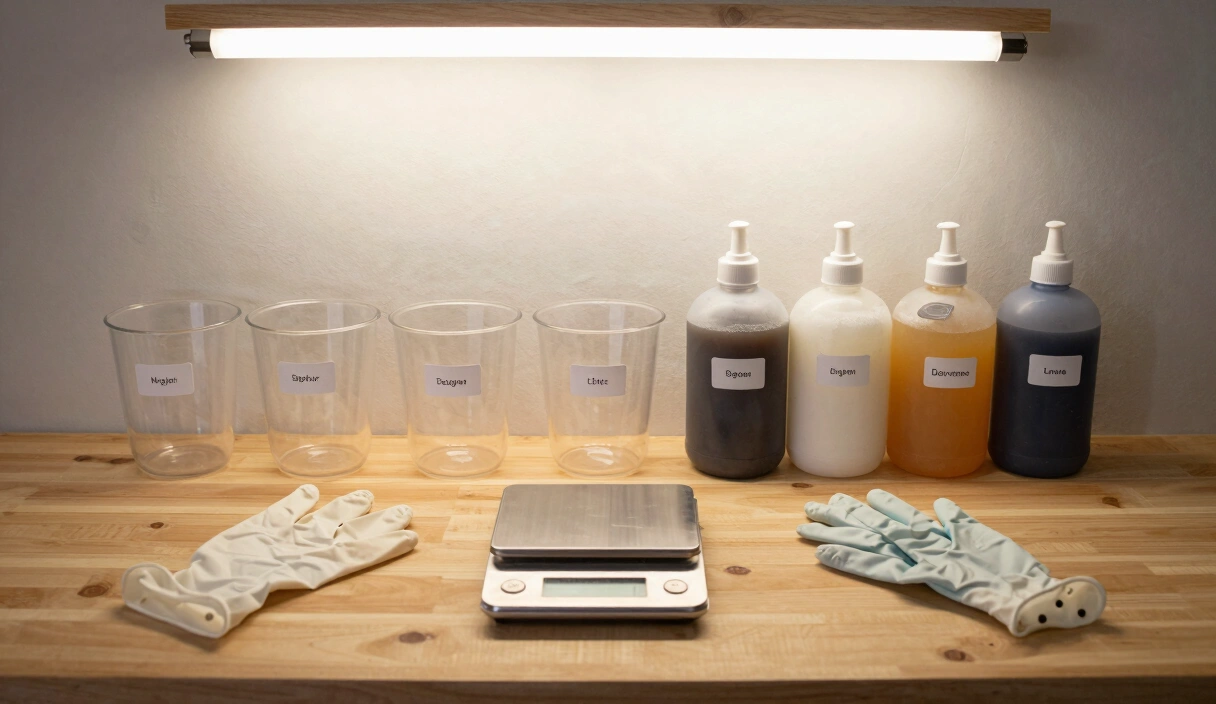
Tier 1: You Cannot Make Dice Without These
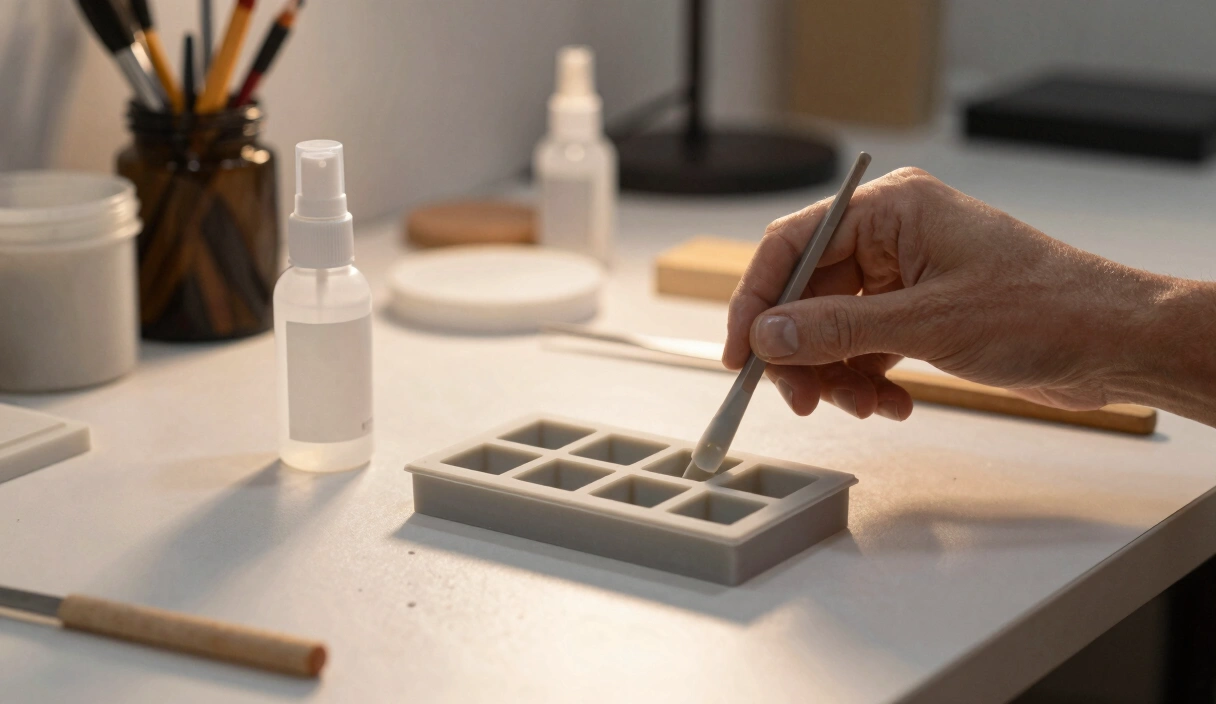
A Silicone Dice Mold
This is your mold — the thing that gives resin its shape. For dice, you have two types:
Sprue molds are single-piece molds with a pour channel (the “sprue”) at the top of each die. Pour resin in, let it cure, pop out the dice. Cheap and beginner-friendly. The downside: the sprue leaves a small nub you’ll need to sand flat, and the parting line (where the mold opens) can show as a faint seam on your finished dice.
Cap molds are two-piece molds with a removable cap. You pour the body, let it partially cure, cap it, and let it finish. More control, cleaner edges, and the foundation of sharp-edge dice making. Also more expensive and slightly more technique-sensitive.
Start with a sprue mold. NanoLabMaker and House of Molds both make reliable ones. Expect to pay $15-35 for a full 7-die polyhedral set. Once you’ve produced dice you’re happy with, the mold care guide will help them last longer.
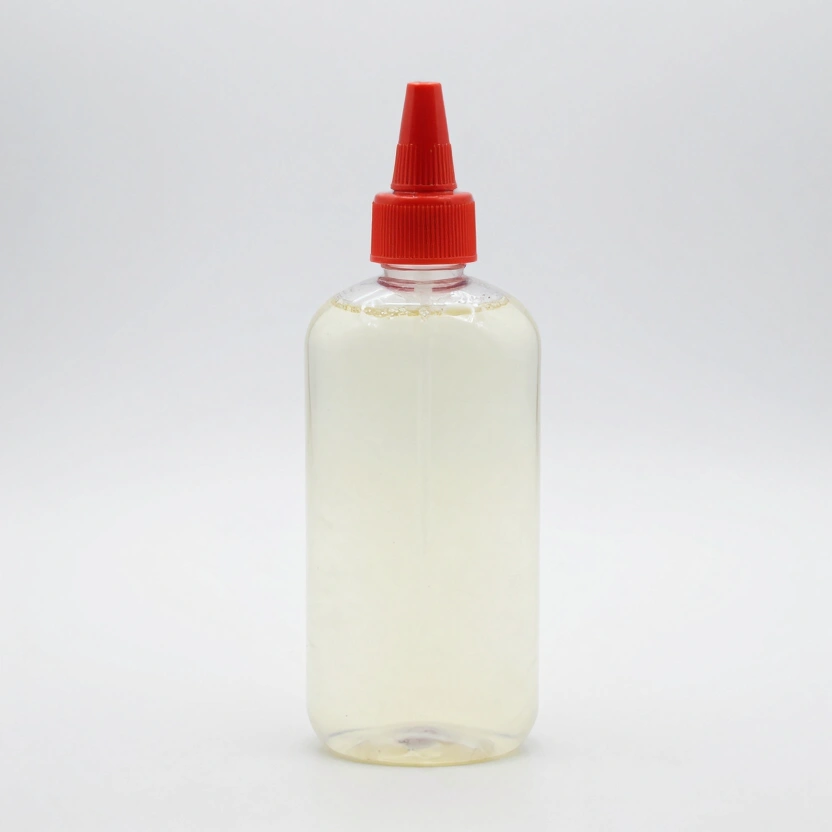
Epoxy Resin (Two-Part)
Epoxy resin comes in two bottles: Part A (resin) and Part B (hardener). Mix them at the specified ratio — usually 1:1 or 2:1 by weight — and the chemical reaction cures the mixture solid.
Why by weight? Because Part A and Part B have different densities. Measuring by volume introduces error; measuring by weight is precise. This matters more than most beginners expect. An off-ratio mix is the leading cause of sticky, uncured resin and the most common beginner mistake.
Brands that work well for dice: Unicone Art Resin (1:1 ratio, excellent clarity), Art ‘N Glow (1:1 ratio, longer working time), Alumilite Amazing Clear Cast (2:1 ratio, faster cure). A 32-ounce kit runs $30-50 and makes roughly 15-25 full dice sets depending on your mold size.
A Digital Scale
Non-negotiable. You need a scale accurate to 0.1 grams for small pours. A kitchen scale accurate to 1 gram isn’t good enough for a die-sized pour. Look for a jewelry or postal scale in the $10-20 range.
Mixing cups with measurement markings are fine as a backup for larger pours, but for dice, the volumes are small enough that weight measurement is the only reliable method.
Mixing Cups and Stir Sticks
Silicone cups are reusable — cured resin peels right out. Disposable graduated plastic cups work too but create waste. Either way, you need something to mix in.
For stir sticks: silicone or metal, not wood. Popsicle sticks have a grain that whips air into resin and generates bubbles you’ll spend the rest of your session fighting. Don’t use them.
Nitrile Gloves and a Respirator
Resin is a skin sensitizer. Repeated skin exposure can cause an allergic reaction that, once developed, never goes away — even brief contact will trigger it. Nitrile gloves cost $10-15 for a box of 100. There’s no good reason to skip them.
The respirator matters for a different reason: uncured epoxy gives off VOCs during mixing and initial cure. A basic dust mask does nothing for chemical vapors. You need a respirator rated for organic vapors — a 3M 6200 series with P100/OV cartridges is the community standard, around $25-35 for the mask with one set of cartridges.
Work in a ventilated space regardless. The respirator is your backup, not your primary protection.
Tier 2: What Separates Good Dice From Great Ones
Picture your first batch. You mixed carefully, poured slowly, let it cure the full 24 hours. You demold with excitement. And then — cloudy dice, full of tiny bubbles, like the resin is permanently foggy. You did everything right.
Without tier-2 supplies, this is the predictable outcome. It’s not a mistake you made. It’s a physics problem you haven’t solved yet.
I still remember holding that first batch up to the window. The light scattered through a thousand tiny air pockets I couldn’t see during the pour. Frustrating doesn’t cover it — I’d followed every step. The problem was that “following every step” doesn’t include the equipment that removes bubbles during cure.
Mica Powder and Alcohol Ink
Colorants are technically optional — you can pour clear dice — but they’re also one of the first things every dice maker buys, and for good reason. These are what make your dice yours.
Mica powder is the most beginner-friendly colorant. Metallic and pearlescent effects, easy to control, mixes cleanly into resin. Eye Candy Pigments and Solar Color Dust both make excellent sampler sets for $15-30. A little goes a long way — a pinch per die is usually plenty.
Alcohol ink creates swirl and petri effects. You drop it into uncured resin and it blooms into organic patterns. Ranger Tim Holtz and Jacquard Pinata are the community standards. Note: some alcohol inks fade with UV exposure over time. If your dice will see sunlight, seal them or choose fade-resistant inks.
Don’t mix both colorant types in the same pour until you understand how each behaves separately. Pick one for your first colored batch.
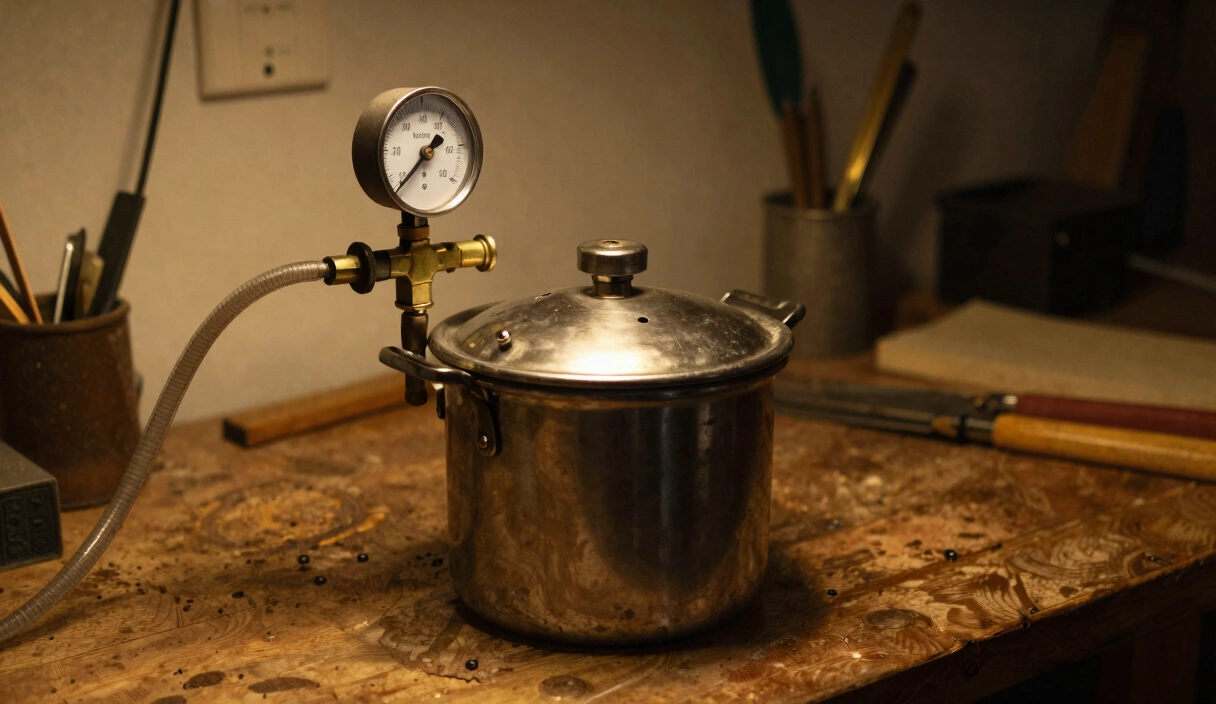
The Pressure Pot Question
A pressure pot compresses air bubbles to invisible size during the cure cycle. At 40 PSI, a bubble that would otherwise scatter light gets compressed to below the threshold your eye can detect. The result: optically clear dice, every time.
Without one, you’re hoping bubbles rise out before the resin gels. Sometimes that works for cap molds with thin pours. For most dice, most of the time, it doesn’t.
The good news: you don’t need to build one. The California Air Tools 255C is a ready-to-use 2.5-gallon casting pot at around $188. The Harbor Freight paint pot costs under $100 and works after a 30-minute modification — Rybonator’s YouTube series covers the conversion. Either paired with a small pancake compressor gives you bubble-free pours.
Our complete pressure pot guide walks through setup, PSI settings, and troubleshooting. The short version: 40 PSI, full cure time under pressure, soapy-water leak test before your first use.
A Heat Gun
Before pressurizing, surface bubbles form on poured resin. A quick pass with a heat gun pops them in seconds. A heat gun costs $20-30 and does this job cleanly — more controlled than a lighter, which can scorch silicone molds.
Keep it moving, 6-8 inches above the mold, two or three passes. You’re not trying to heat the resin, just breaking surface tension on visible bubbles before they get locked in.
Tier 3: Upgrade Path (Don’t Buy This First)
You will want all of this eventually. But if you buy it on your first order, half of it will sit unused for six months while you figure out the basics.
Zona Polishing Papers. Graded abrasive sheets for the final polish stage after wet sanding. Essential for sharp-edge dice finish. Not something you need until you’re producing dice worth polishing.
Wet/dry sandpaper (400-3000 grit). The sanding progression — 400, 600, 800, 1000, 1500, 2000, 3000 grit, used wet — comes after you can reliably produce clear, cured dice. Learn to demold cleanly first.
Rock tumbler. Automated polishing for round-edge dice. Useful for batch production. Not for your first month.
UV lamp. Good for curing UV resin repairs and checking inclusions. A nice tool once you need it. Don’t buy it first.
When you’re ready for the finishing work, the dice balance test guide covers what matters after your dice come out of the mold. And when temperature starts affecting your cure times, the resin curing temperature guide explains exactly what’s happening.
Where to Buy and What to Spend
Amazon handles most tier-1 needs fine: scales, gloves, respirators, mixing cups. Be cautious with resin kits — cheap bundles often use resin with poor clarity or inconsistent ratios. Buy resin from known brands even if it costs more than a generic kit.
Specialty suppliers for molds and colorants: NanoLabMaker makes high-quality dice molds and sells direct. CritMaker offers mold and kit bundles with everything to start, which is worth considering if you want one order rather than six.
For colorants: Eye Candy Pigments and Solar Color Dust ship from the US with consistent quality. For alcohol inks, craft stores (Michael’s, Hobby Lobby) carry Ranger Tim Holtz in-store, which saves shipping time.
Three Honest Starter Budgets
$50 bare minimum: One sprue mold ($20), 32oz resin kit ($30). You get clear dice with no color effects, visible bubbles, and a lot of learning. Worth doing at least once.
$120 functional starter: Add a digital scale ($15), mica powder sampler ($20), nitrile gloves ($12), respirator ($35). Now you have colored dice with proper safety habits. Still no pressure pot, but you understand what you’re working toward.
$280 bubble-free capable: Add a Harbor Freight pressure pot ($85) and a pancake compressor ($80) if you don’t own one. This is the setup that produces dice you’d be comfortable selling. Before your first pressurized pour, read the resin yellowing prevention guide — some resin formulas are more UV-stable than others, and it’s worth knowing before you pick your brand.
FAQ
What is the minimum I need to spend to start making dice? Around $35-50 for a single sprue mold and a small resin kit. That gets you clear dice with visible bubbles and no color effects — enough to learn the process without committing to the full setup.
Can I use any silicone mold, or does it need to be a dice-specific mold? Dice-specific molds. The critical difference is proportions: a D20 needs all 20 faces to be identical triangles, and a D6 needs perfectly square faces to be fair. Generic silicone molds won’t produce properly balanced polyhedral dice. Use molds made specifically for gaming dice.
Do I really need a respirator for resin? Yes. Uncured epoxy fumes contain volatile organic compounds. A basic dust mask doesn’t filter VOCs. The 3M 6200 series with organic vapor cartridges costs about $35 and lasts months with occasional use. It’s one of the few supplies on this list where cutting corners has real health consequences.
What’s the most common mistake beginners make with their first supply order? Buying tier-3 tools before mastering tier-1. The UV lamp, the rock tumbler, the advanced mold sets — these are finishing tools. They don’t help you produce clean, cured dice. Get one good mold, one reliable resin, a scale, and safety gear. Pour 10 dice sets. Then upgrade.
Is epoxy resin or UV resin better for dice making? Epoxy for casting dice. UV resin cures too quickly for filling a full die mold, costs more per volume, and produces more shrinkage. UV resin has its place for small repairs and patches, but the workhorse of dice making is two-part epoxy.
There’s a moment that happens once your supplies are properly laid out on the table. Scale zeroed. Resin bottles open. Colorant ready. Safety gear on. You measure Part A, then Part B. The mixing begins, and the cloudy swirl of two liquids becoming one — that’s it. That’s the whole craft in miniature. Every complicated technique in dice making is a variation on this moment.
The supply list gets easier from here. Start with tier 1, make some dice, feel the limitations of what you have. Add tier 2 when the frustration tells you it’s time. The pressure pot comes when you’re tired of bubbles. The polishing papers come when you want sharper edges. The upgrade path reveals itself through the work.
Starter Essentials
Art 'N Glow Epoxy Resin Kit (32 oz)
Crystal-clear 1:1 mix ratio epoxy. UV resistant, self-leveling. The community favorite for dice casting.
Check Price on Amazon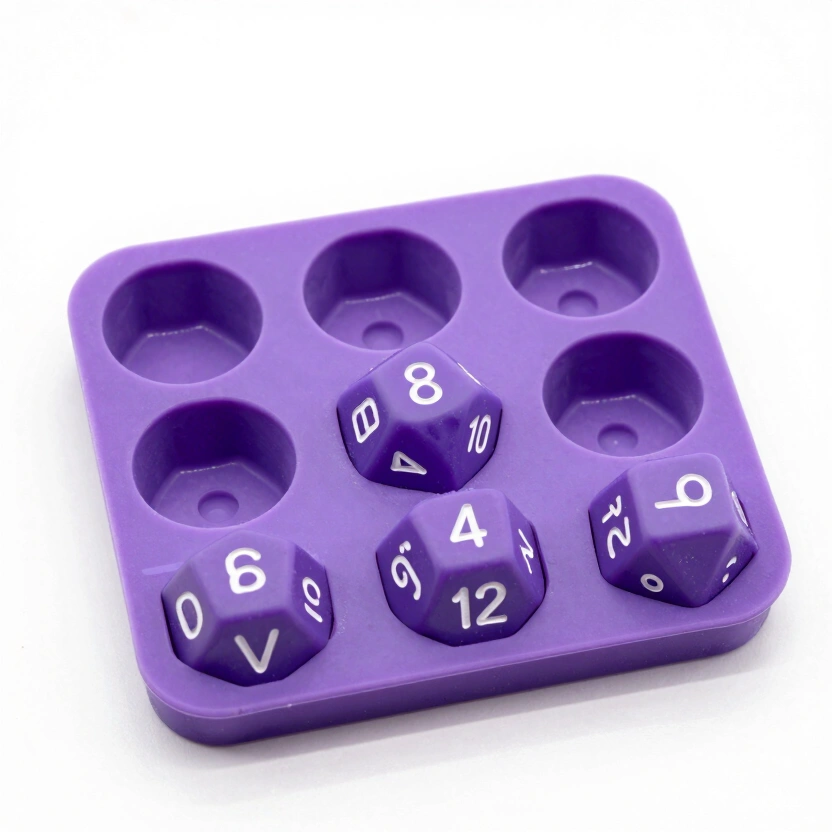
LET'S RESIN Polyhedral Dice Mold Set (7 Shapes)
Stereoscopic 7-piece silicone mold for D4-D20. Pre-made sprue channels. Top-selling beginner mold.
Check Price on Amazon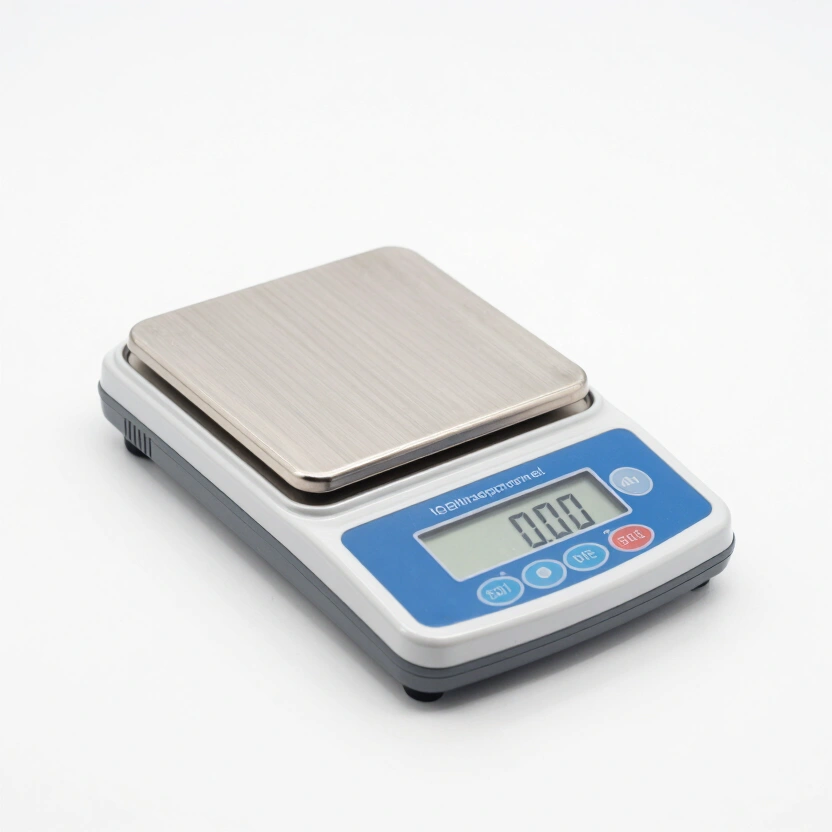
Fuzion Digital Scale (0.01g Precision)
Precise to 0.01g for accurate resin mixing ratios. Tare function, backlit display. Essential for consistent pours.
Check Price on Amazon* Affiliate links. Prices last updated March 6, 2026.
Pick your first mold. Order your resin. Make the first pour.
Related Articles
Silicone Dice Molds: Sprue vs. Cap, Which Brands to Trust, and What to Avoid
Sprue molds or cap molds? NanoLabMaker or House of Molds? Here's the practical guide to choosing the right silicone dice mold for your skill level and goals.
Pressure Pot for Resin: The Complete Dice Maker's Guide
Bubble-free dice start inside a steel tank. Here's exactly which pressure pot to buy, how to set it up, and the PSI settings that actually work.