Wet Sanding Resin Dice: Why Water Makes All the Difference
Learn the wet sanding technique for resin dice — water temperature, dip-and-sand method, paper choices, and the mistakes that leave your finish hazy.
Contents
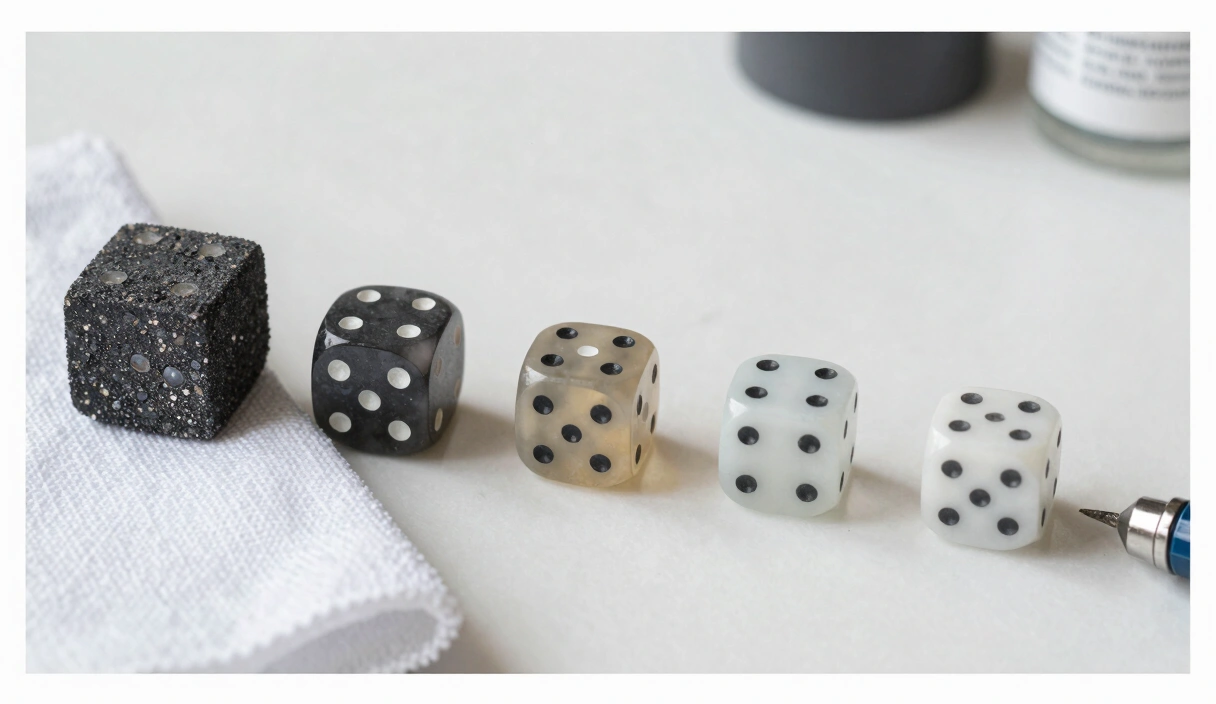
I ruined my fourth set of dice before I figured out what water actually does. Not ruined as in “they look a little rough” — ruined as in cloudy, heat-hazed faces with scratches baked into softened resin that no amount of polishing could fix. I’d been dry sanding all the way through 3000 grit, pressing harder each step, wondering why my dice looked worse the longer I worked on them. Then someone on r/DiceMaking told me to put some water on the paper. That was it. That was the whole fix.
If you already understand the full grit progression from 400 to 12000, this article is about the specific technique that makes those upper grits actually work. Not which grits to use — how to use water while you sand, and why skipping it costs you clarity you can never get back.
Why Wet Sanding Beats Dry Sanding for Resin
Four things happen when you add water to your sanding process, and every single one matters for resin.
Lubrication Prevents Clogging
Resin dust is sticky. When you dry sand above 600 grit, microscopic resin particles pack into the spaces between abrasive grains within thirty to sixty seconds. The paper goes slick. It stops cutting. You press harder — which generates more heat and more dust — and the paper clogs faster. It’s a losing cycle.
Water floats that debris away before it can pack in. The abrasive stays exposed and keeps cutting at a consistent rate. A single Zona sheet that lasts one die face dry can handle four to five faces wet.
Cooler Surface Means No Heat Damage
Friction between abrasive and resin generates heat. Epoxy resin begins to soften around 140°F (60°C), and localized surface temperatures during aggressive dry sanding can exceed that in under a minute. Softened resin deforms under even light pressure — edges round over, flat faces develop subtle waves, and the surface picks up distortion that shows under angled light.
Water acts as a heat sink. It absorbs friction energy and carries it away from the contact point. Surface temperature during wet sanding rarely exceeds 85°F (29°C), even with sustained pressure. Your resin stays rigid, your geometry stays accurate — which matters if you care about dice balance at all.
I learned this the expensive way. My early dice had edges that looked sharp out of the mold but went soft and rounded after sanding. I blamed my molds. It was heat. Wet sanding fixed it completely.
Finer Finish at Every Grit
Dry abrasive leaves deeper, more jagged scratches than the same grit used wet. The water creates a thin film between the abrasive particles and the resin surface, allowing the grains to cut rather than gouge. At 2000 grit, the difference in scratch depth between wet and dry is roughly 30 to 40 percent. By 5000 grit, dry sanding barely functions — the particles are too fine to cut through their own debris.
Virtually No Dust
Resin dust is a respiratory irritant. Fine particles from grits above 1000 stay airborne for minutes and settle on everything in your workspace. Wet sanding traps all of it in the water slurry. No airborne particles, no dust on your desk, no inhaled resin. You should still work in a ventilated space, but the exposure difference between wet and dry sanding is enormous.
When to Switch from Dry to Wet
Not every sanding step needs water. The coarse work — removing flash, leveling sprue nubs, correcting mold lines — benefits from the aggressive, fast material removal that dry abrasive provides. Water slows that process down because it reduces friction, which is exactly what you don’t want when you’re trying to shape geometry.
Dry: 220 Through 400 Grit
Use dry sanding for the shaping stage. Flash removal, sprue trimming, and face-leveling happen here. The scratches are deep and visible, the dust is coarse enough to brush off easily, and the heat buildup is manageable at low grits because you’re making short, controlled passes — not sustained friction.
Keep your passes short. Five to ten strokes per face at 220 grit, then check your progress. You’re removing material fast at this stage, and taking off too much is worse than taking off too little.
The Transition: 600 Grit
600 grit is the pivot point. Some makers dry sand at 600, some go wet. Either works, but if you notice the paper loading up with white resin dust before you finish a face, switch to wet. The cost of the transition is maybe ten seconds of dipping your paper. The cost of clogged 600-grit paper is re-doing the face.
Wet: 800 and Everything Above
From 800 grit onward, wet sanding is not optional. The abrasive particles are fine enough that dry resin dust clogs them almost instantly. You’ll feel the paper go slick and stop cutting — and if you push through anyway, you’ll generate heat without removing material. That’s the worst combination: thermal damage with no progress.
Once you go wet at 800, stay wet through every subsequent grit all the way to 12000. No exceptions.
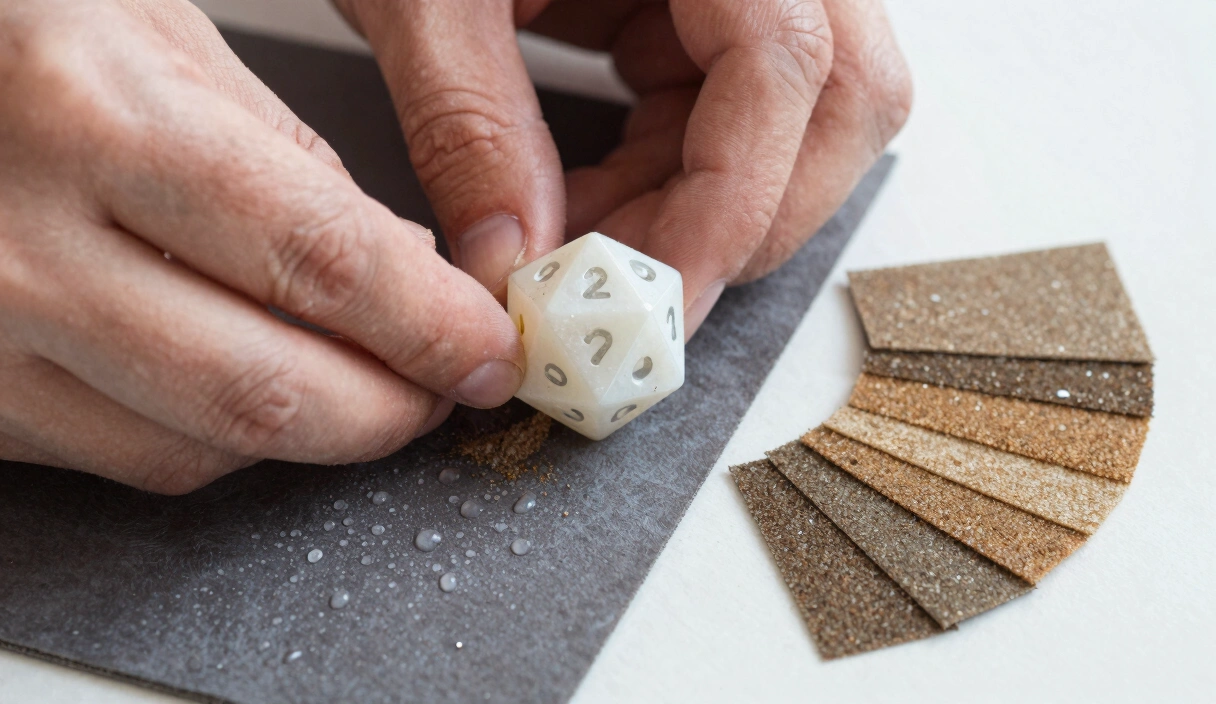
The Wet Sanding Technique
The method is simple, but the details matter. Sloppy wet sanding produces results only marginally better than dry sanding. Controlled wet sanding produces glass.
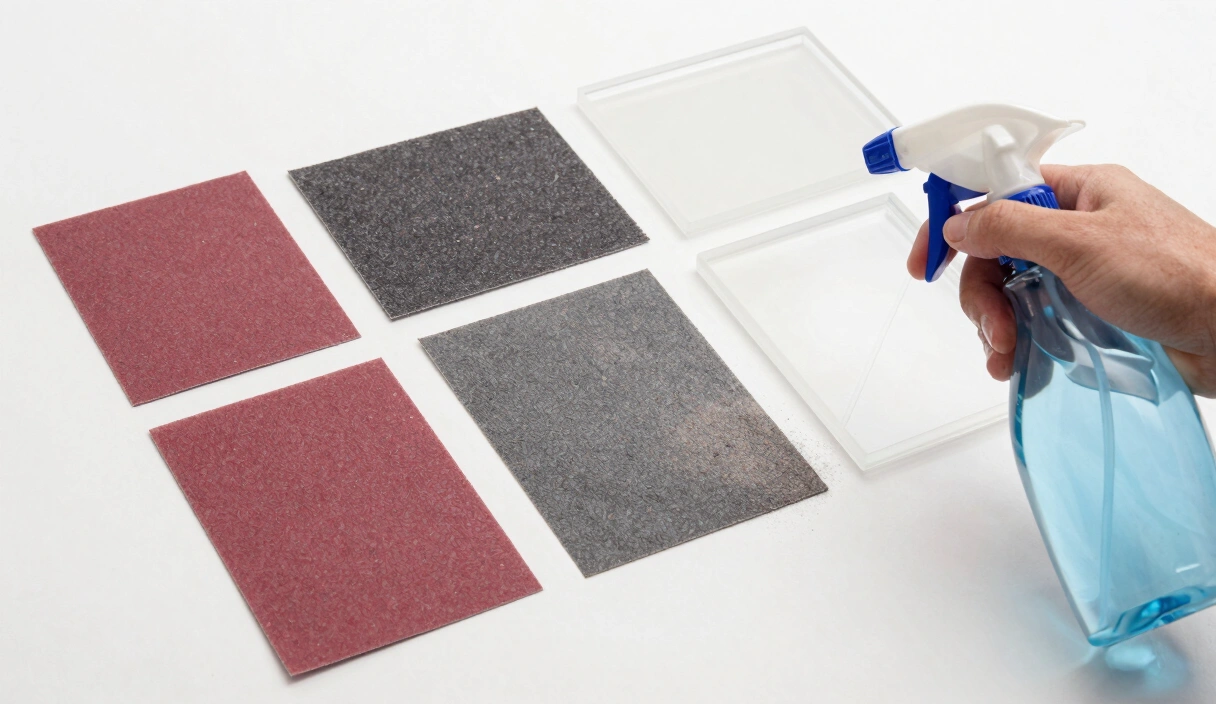
Setting Up Your Water Station
Keep a shallow dish — a ceramic plate or a glass baking dish works well — filled with about half an inch of clean water next to your sanding surface. Room temperature water is fine. Cold water from the tap works. Avoid hot water; it warms the resin surface and partially defeats the purpose of wet sanding.
Some makers add a single drop of dish soap to the water. The surfactant reduces the water’s surface tension, helping it spread more evenly across the abrasive and the die face. I’ve tested this side-by-side: soapy water produces a marginally smoother result at grits above 3000. Below that, the difference is undetectable. Try it if you want. Skip it if you don’t.
Dip-and-Sand vs. Running Water
Two methods exist, and both work.
Dip-and-sand is the most common approach for dice. Dip the sandpaper in your dish, place it on your flat reference surface (glass or granite tile), dip the die, and sand. Re-dip both the paper and the die every fifteen to twenty seconds, or whenever the slurry on the paper turns opaque white. This method uses less water, makes less mess, and gives you more control over how wet the surface stays.
Running water means holding the die under a slow stream from the tap while sanding against a pad in your other hand. This is faster for large, flat faces — d6 faces and the broad triangles on a d20 — because the constant flow washes debris away instantly. The tradeoff: it’s harder to maintain a flat reference surface, and you’ll go through more water. Some makers reserve running water for the final grits (8000 and 12000) where debris clearance matters most.
Pick one method and learn it well before switching. Consistency matters more than which technique you choose.
The Figure-Eight on a Flat Surface
Lay your wet sandpaper on a flat reference surface — a piece of float glass or a granite tile sample. Press the die face against the paper and move it in a figure-eight pattern. Not circles, not straight lines. The figure-eight distributes wear evenly and prevents directional scratch patterns.
Fifteen to twenty passes per face. Rotate the die 90 degrees. Another fifteen to twenty passes. Move to the next face. Complete all faces at one grit before advancing to the next.
Cleaning Between Grits
This is where most wet sanding goes wrong. The milky slurry sitting on your paper and your die contains abrasive particles from the current grit. If those particles carry over to your next, finer grit, they cut scratches that the finer abrasive cannot remove.
Between every grit change: rinse the die under running water for five seconds. Wipe it with a clean microfiber cloth. Rinse your fingers. Dump and refill your water dish. If you use labeled zip-lock bags for each Zona sheet — and you should — make sure the die is fully dry before setting it on any storage surface.
Paper and Pad Options for Wet Sanding
Not all abrasives are designed to get wet. Standard hardware-store sandpaper in the finer grits often uses a water-soluble adhesive to bond the abrasive to the backing — add water and the grit falls off. You need products specifically rated for wet use.
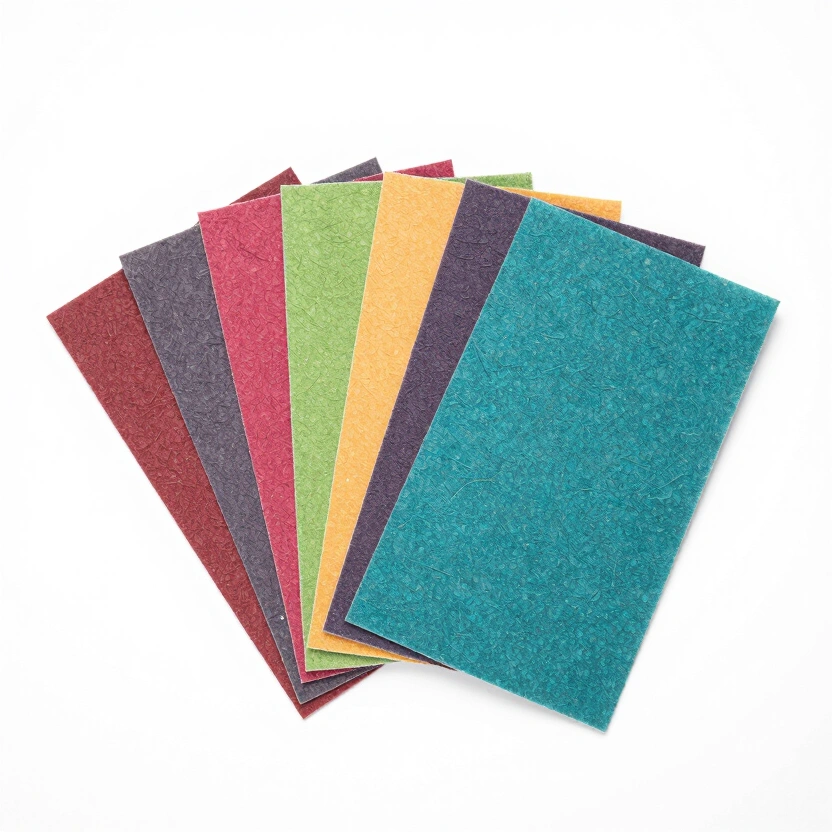
Zona Papers (3M)
Zona polishing papers are the default choice in the dice-making community for good reason. They’re engineered for wet use on plastics and resins. The color-coded grit system (grey through lavender) eliminates confusion. Each sheet is thin enough to lay perfectly flat on glass but durable enough to handle sustained wet sanding without tearing or delaminating.
A standard Zona assortment pack costs $10 to $14 and covers the full progression. One pack lasts two to three full dice sets with careful use. For the central role sanding plays in making dice, that’s a trivial cost.
Micro-Mesh Cushioned Pads
Micro-Mesh pads use abrasive particles bonded to a flexible foam backing. They’re fully wet-rated and excel on curved surfaces and tight vertices — the sharp points of a d4, the narrow faces of a d10. The foam backing absorbs some pressure, making them more forgiving but slower on flat faces.
Some makers combine both: Zona on flat faces, Micro-Mesh on vertices and edges. That’s a solid approach if you’re willing to manage two systems.
Wet/Dry Automotive Sandpaper (Budget Option)
Automotive wet/dry sandpaper from an auto parts store works for grits 600 through 2000. It’s cheap — a multi-pack for under $8 — and the wet/dry adhesive holds up. Above 2000 grit, particle-size consistency drops, and you’ll see uneven scratch patterns that Zona and Micro-Mesh don’t produce. Use automotive paper for the early wet grits and switch to Zona or Micro-Mesh at 2000 or above.
Common Wet Sanding Mistakes
Five errors show up constantly in community forums and in my own early work. Every one of them is avoidable.
Not Enough Water
If the slurry on your paper turns from translucent to opaque milky white, you waited too long to re-dip. That white paste is packed resin debris, and it’s grinding against your die face like a fine abrasive compound — except with random, uncontrolled particle sizes. Re-wet every fifteen to twenty seconds minimum. When in doubt, dip again.
Pressing Too Hard
Heavy pressure compresses the water film between the abrasive and the resin, reducing lubrication. It also flexes Zona papers against the reference surface, creating uneven contact. The weight of two fingers resting on the die is sufficient force. If progress feels slow, the paper is clogged or worn — replace it. Don’t compensate with pressure.
Skipping Grits
This mistake isn’t unique to wet sanding, but the consequences are more visible because wet sanding produces a cleaner finish at each step. Jump from 800 to 2000 and you’ll see the 800-grit scratch pattern preserved perfectly under the 2000-grit finish — like looking at cracks through clear ice. Each grit can only remove scratches close to its own depth. There are no shortcuts through the progression.
Not Cleaning the Slurry Between Grits
The single most common cause of mysterious haze and ghost scratches on otherwise well-sanded dice. That slurry contains particles from the grit you just used. Transfer even a trace to your next sheet and you’ve contaminated it. Rinse the die, rinse your hands, change your water. Every time.
Be honest with yourself here. This step feels excessive until you re-sand a full seven-die set because of one contaminated grit change. After that, rinsing takes on a certain urgency.
Frequently Asked Questions
Does water temperature matter for wet sanding resin?
Room temperature or cool tap water is ideal. Cold water won’t harm anything. Hot water — above 110°F (43°C) — warms the resin surface, reducing the thermal protection that wet sanding provides. Some makers use slightly warm water in cold workshops to keep their hands comfortable, and that’s fine. Just avoid filling your dish from the hot tap.
Can I wet sand resin that isn’t fully cured?
No. Resin needs a full 72 hours at room temperature before sanding — wet or dry. Under-cured resin is soft enough that water penetrates micro-scratches and creates a cloudy, whitened surface that won’t polish out. If your workshop runs below 70°F (21°C), add another 24 hours. Test on a scrap piece from the same pour if you’re unsure.
How do I know when to move to the next grit?
Hold the die under a bright, focused light — a desk lamp works — at a shallow angle, about 15 to 20 degrees from the surface. You should see a uniform scratch pattern with no deeper scratches visible from the previous grit. If you spot stray deep lines, stay at the current grit until they’re gone. Moving forward with remnant scratches means you’ll either carry them to the end or have to backtrack.
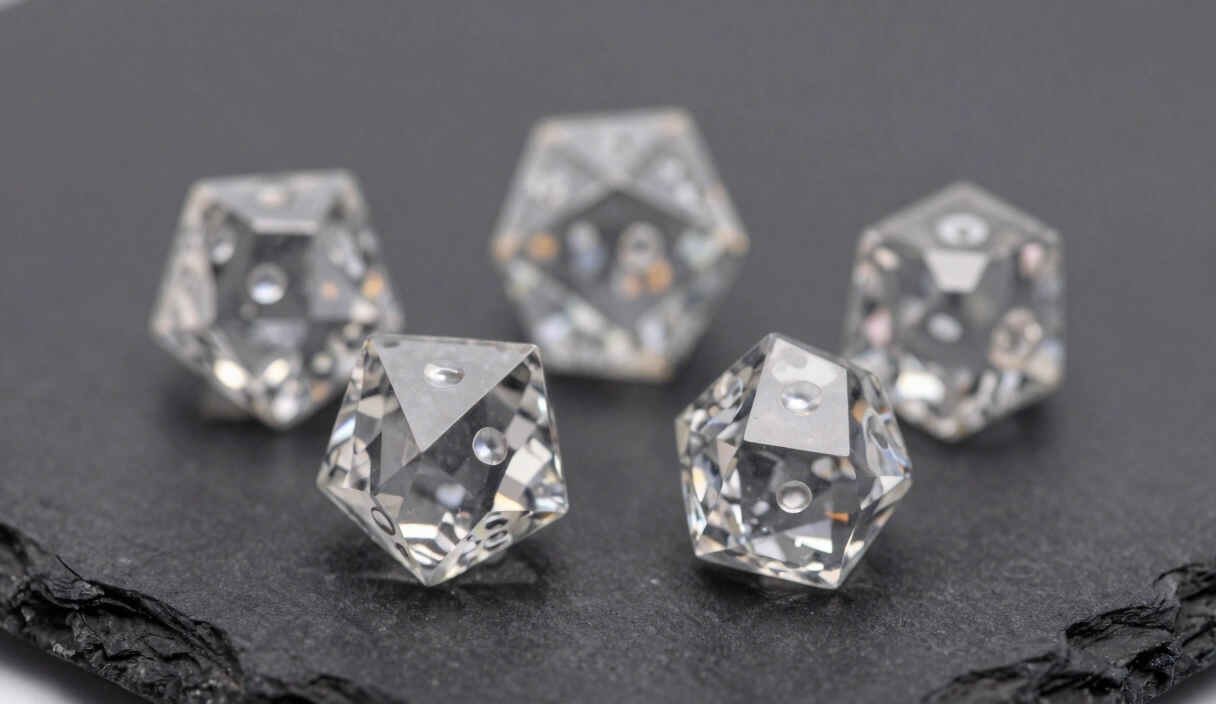
Is wet sanding enough, or do I still need to polish?
Wet sanding through 12000 grit produces near-optical clarity, but most makers follow it with a polishing step using a compound like Novus 2 or Meguiar’s PlastX to achieve a full glass finish. Think of wet sanding as removing all visible scratches and polishing as removing the ones only light can find. For opaque dice, wet sanding to 3000 or 5000 grit plus a quick polish is usually sufficient.
Wet Sanding Supplies
Ultra Fine Wet/Dry Sandpaper (120-10000 Grit)
Wide grit range for resin sanding. Start coarse, work up to mirror finish. 9x3.6 inch sheets.
Check Price on Amazon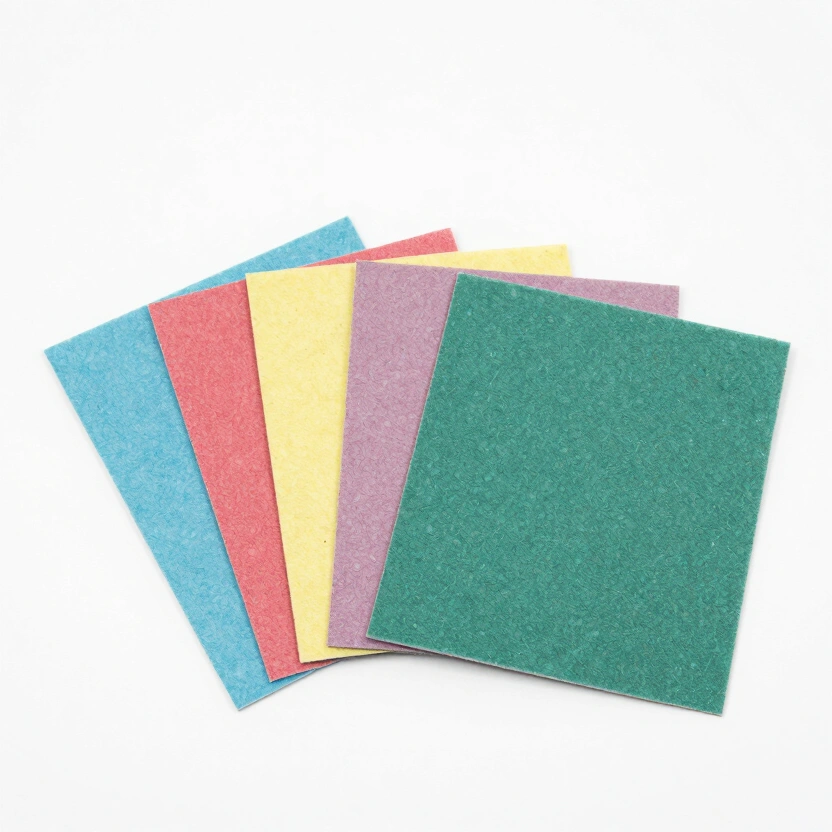
Zona 37-948 Polishing Paper Assortment (1-30 Micron)
6 progressive grits from 30µ to 1µ. The gold standard for hand-polishing sharp-edge dice to glass clarity.
Check Price on Amazon* Affiliate links. Prices last updated March 6, 2026.
Your next step after mastering wet sanding is the polishing stage — where those micro-scratches below 1 micron finally disappear and the die turns into something that looks like it was injection-molded from gemstone. The technique is easier than sanding. The satisfaction is greater. But it only works if the wet sanding underneath was done right.
Related Articles
How to Sand Resin Dice: The Complete Grit Progression Guide
Master the 400-to-12000 grit sanding progression for resin dice. Zona papers, wet sanding technique, and the mistakes that keep your dice cloudy.
How to Polish Resin Dice: From Cloudy to Crystal Clear
Your dice look like frosted glass, not gemstones. Here's the exact sanding and polishing sequence that fixes that — no shortcuts, no myths.
Sharp Edge Dice: Why They Cost More and How to Make Them
Most dice makers overcomplicate sharp edges. The real secret is patience, flat surfaces, and knowing when to stop sanding. Here's the full process.