How to Polish Resin Dice: From Cloudy to Crystal Clear
Your dice look like frosted glass, not gemstones. Here's the exact sanding and polishing sequence that fixes that — no shortcuts, no myths.
Contents
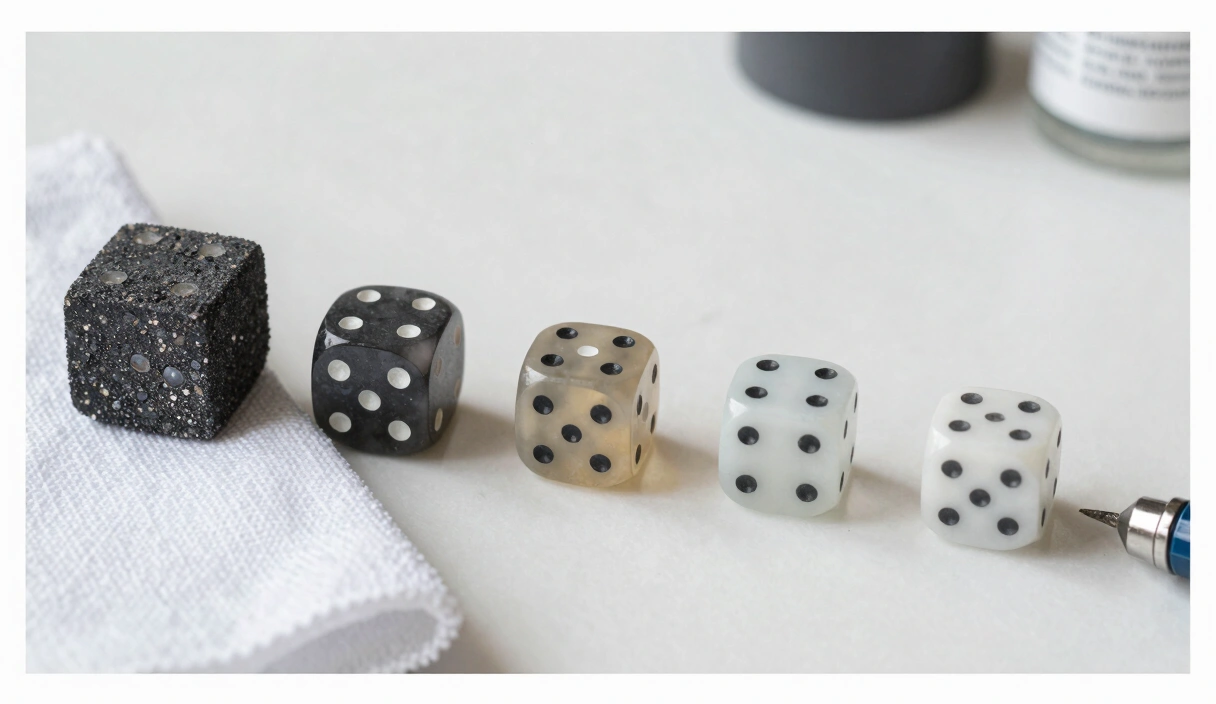
The resin smell still hangs in the air. You crack open the pressure pot, pop a d20 out of the mold, and hold it up to the light. The shape is perfect — clean edges, sharp vertices, numbers crisp and legible. But the surface looks like a bathroom window. Cloudy. Matte. Nothing like the glass-clear gem you poured twenty-four hours ago.
That cloudiness isn’t a defect. It’s just the starting line. Every resin die comes out of the mold looking rough, and every finished die you’ve admired on Etsy or Instagram went through the same unglamorous process you’re about to learn: removing material, then removing scratches, then removing the scratches left by removing the scratches.
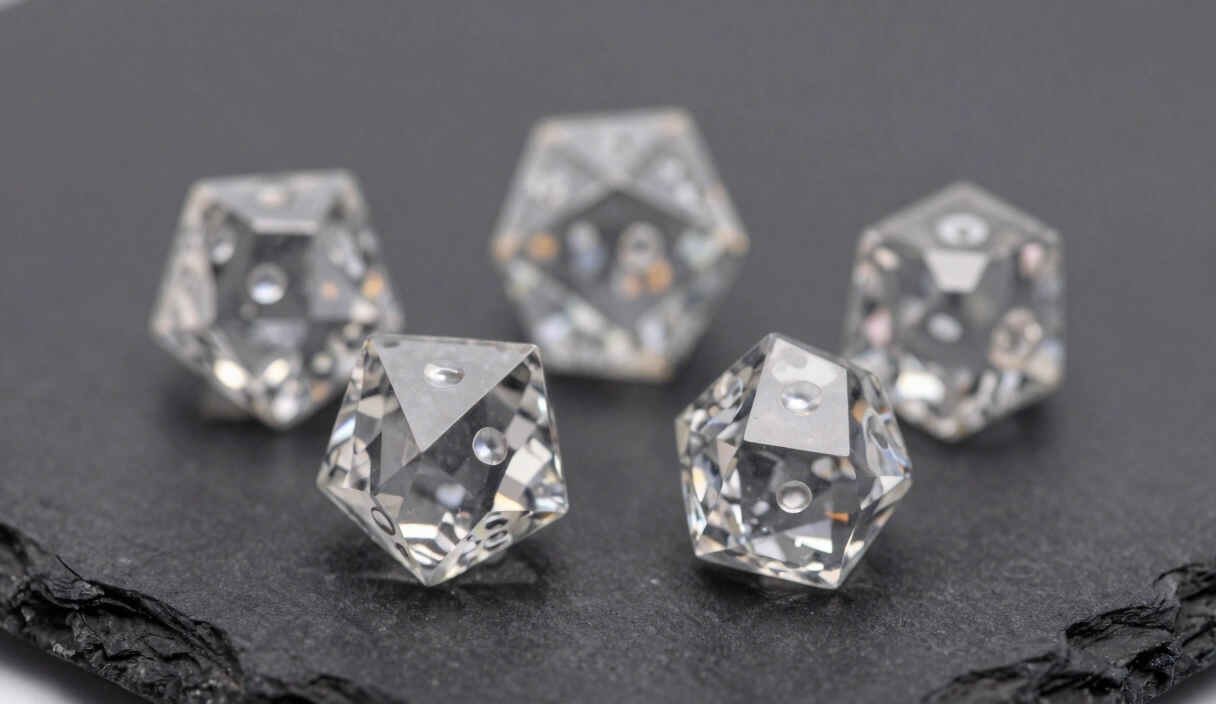
This is the polishing progression. It’s tedious, it’s meditative, and when you finally hold a die that bends light like a prism — it’s the most satisfying moment in the entire dice-making process.
Removing Flash and Sprue Marks
Before any sanding happens, you need to deal with the structural leftovers from demolding. Every die has them: flash (the thin film of resin that seeps between mold halves) and the sprue (the stem of cured resin from your pour channel).
Cutting the Sprue
Use flush cutters — the kind with one flat side — and cut the sprue as close to the die face as possible. Don’t try to cut it perfectly level. Leave about 1 mm (1/32 inch) of material standing proud of the surface. Cutting too aggressively will gouge the face below, and you’ll spend the next hour sanding out a divot that didn’t need to exist.
Maker’s Note: I ruined my first six sets by twisting the sprue off with pliers instead of cutting it. The resin cracked into the face every time. Flush cutters cost $6. Buy them.
Filing and Initial Shaping
After cutting, use a fine needle file or a 220-grit sanding stick to bring that remaining nub level with the die face. Work in one direction, not back and forth. Check your progress constantly — hold the die at eye level, rotate it under a light source, and run your fingernail across the surface. If your nail catches, you’re not level yet.
Flash along the mold seam gets the same treatment. Peel off anything loose with your fingers, then file the rest. The goal here isn’t smoothness. It’s geometry. Every face should be flat, every edge should be crisp, and no leftover material should change the die’s profile. If you plan to run a dice balance test later, starting with accurate geometry matters more than you think.
Wet Sanding Progression: The Zona Paper Method
This is where the real work lives. Wet sanding is the process of using progressively finer abrasives to replace coarse scratches with finer scratches until the scratches become too small for light to scatter off of. That’s all “clarity” is — the absence of scratches large enough for your eye to detect.
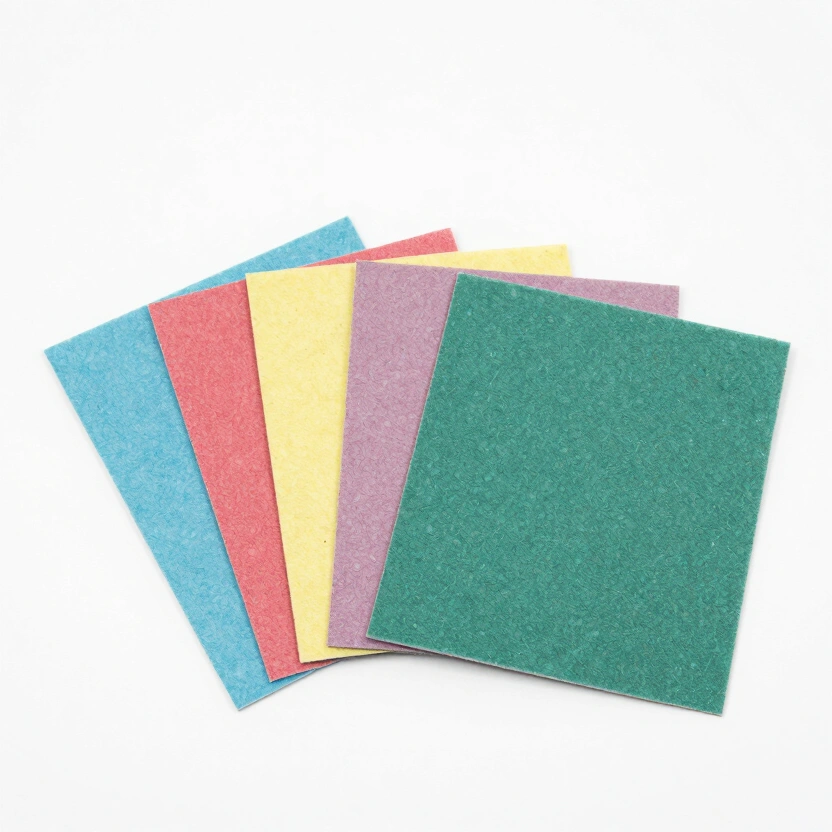
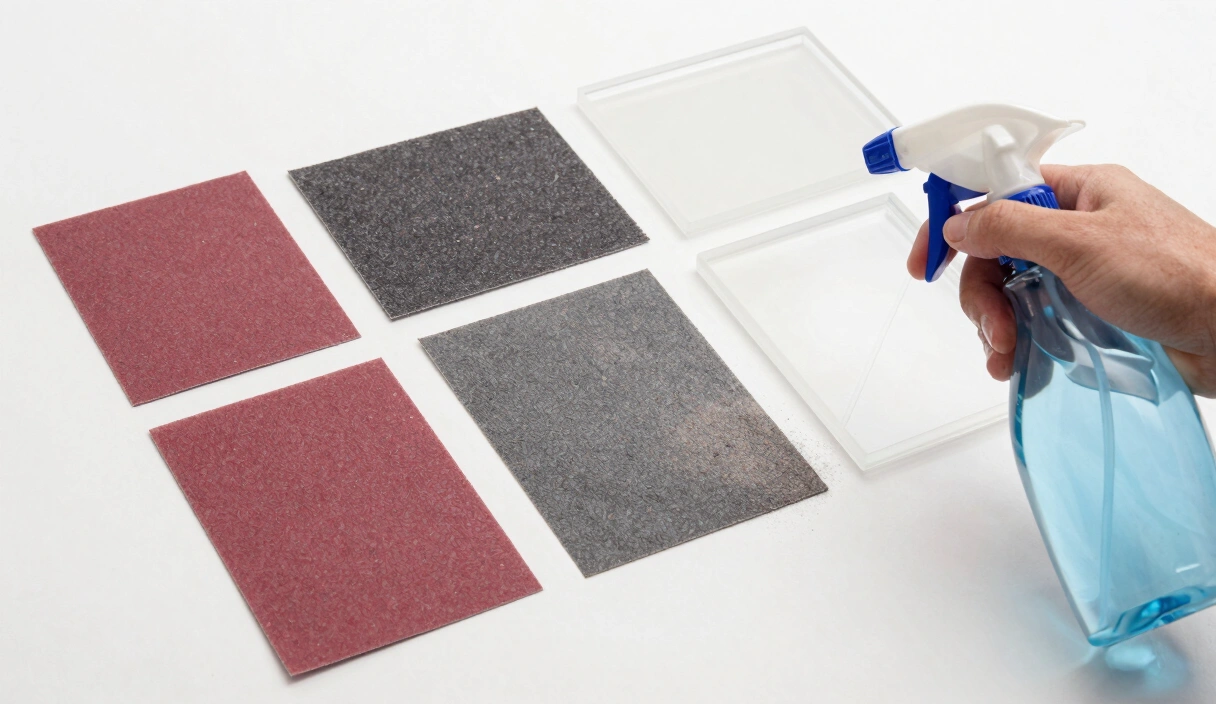
The gold standard for resin dice is 3M Zona papers. They’re color-coded by grit, available in small sheets, and they last surprisingly long when used wet. Here’s the full progression:
The Grit Sequence
| Step | Grit | Zona Color | What It Does |
|---|---|---|---|
| 1 | 400 | Grey | Removes file marks, flattens surfaces |
| 2 | 600 | Grey (fine) | Smooths 400-grit scratches |
| 3 | 800 | Grey (superfine) | Transitional — surface starts to feel slick |
| 4 | 1000 | Green | The “turning point” — die begins to show depth |
| 5 | 1500 | Blue | Fine polish begins |
| 6 | 2000 | Pink | Surface feels like glass to the touch |
| 7 | 3000 | Peach | Light begins to pass through clearly |
| 8 | 5000 | Mint | Near-optical clarity |
| 9 | 8000 | Light blue | Pre-final polish |
| 10 | 12000 | Lavender | Mirror finish — you can read text reflected in the face |
How to Actually Sand
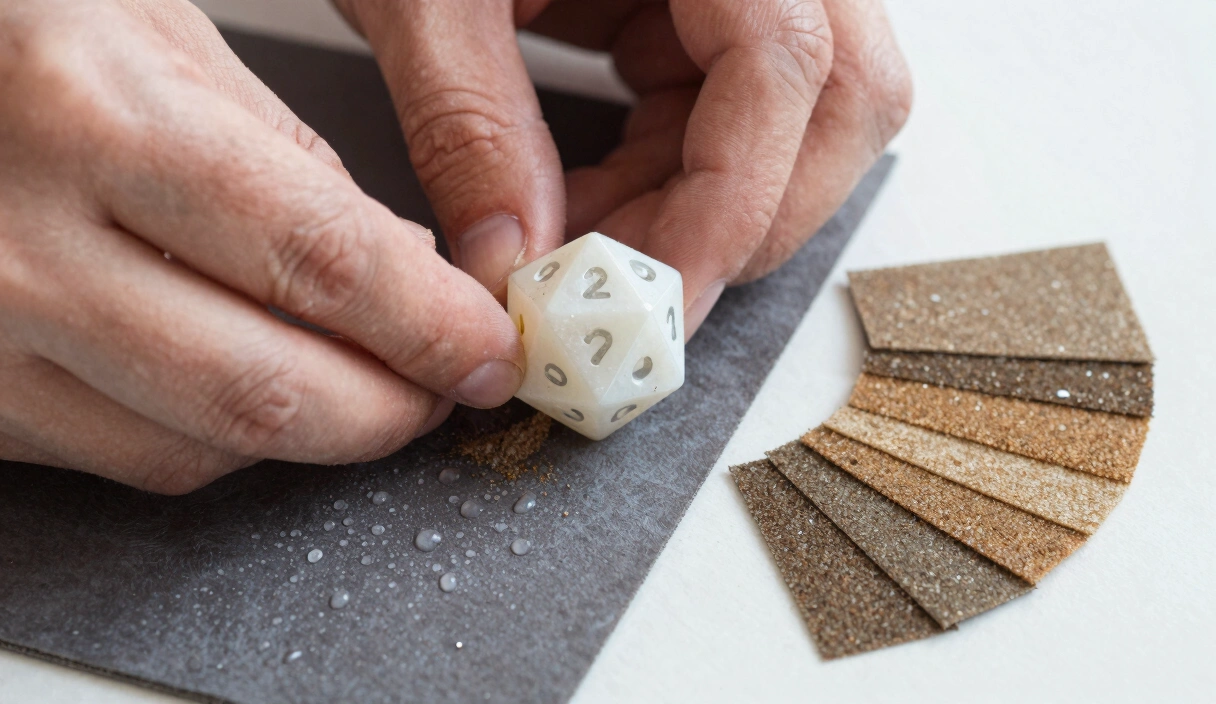
Keep it wet. Dip the paper in water, dip the die in water, and re-wet every fifteen to twenty seconds. Water floats away particles that would otherwise re-scratch the surface. Dry sanding resin is a waste of your time and your paper.
Work each face individually. Place the Zona paper on a flat, hard surface (a piece of glass works best). Hold the die with the target face down and move it in small circles — roughly fifteen to twenty passes per face. Rotate the die 90 degrees and do another fifteen to twenty. This cross-hatch pattern prevents directional scratches.
Do every grit on every face before moving to the next grit. Sand all faces at 400, then all faces at 600, then all faces at 800. Skipping ahead on one face while others lag behind creates uneven clarity that’s obvious in the final die.
Rinse the die between grits. Particles from a coarser grit will contaminate finer paper and introduce scratches you can’t explain. A quick dunk and wipe with a microfiber cloth takes three seconds and saves twenty minutes of rework.
Data point: At 1000 grit, the average scratch depth is roughly 8 microns. At 12000 grit, you’re below 1 micron — smaller than a red blood cell. That’s the difference between “foggy” and “crystal.”
When to Use Micro-Mesh Instead
Micro-Mesh cushioned pads are a solid alternative to Zona papers, especially for curved or irregular faces. They conform to surfaces better because of their foam backing, and they’re available in the same grit range. The tradeoff: they wear out faster, and the cushioning means you remove material more slowly on flat faces. For a standard polyhedral set, I prefer Zona on flat faces and Micro-Mesh on the d4 vertices where paper tears easily.
The frustration hits hardest around 1500 to 2000 grit. You’ve been sanding for forty-five minutes. The die looks better, but it still isn’t clear. You start wondering if you missed a step, if your resin is bad, if you should just coat it and call it done. Push through. The jump from 3000 to 5000 is where clarity appears almost suddenly, and by 8000 you’ll understand why people do this by hand at all.
Machine Polishing vs. Hand Polishing
Hand sanding through the full Zona progression takes roughly sixty to ninety minutes per set of seven dice. Machine polishing can cut that time — but only if you know what you’re doing, and only for the final stages.
Rotary Tool Polishing (Dremel Method)
A Dremel or similar rotary tool fitted with a felt buffing wheel can replace the 5000-to-12000 range of hand sanding. Here’s the setup:
- Speed: 5,000 to 8,000 RPM. Not higher. Resin softens above 140°F (60°C), and a fast buffing wheel generates heat quickly. If the die feels warm to the touch, stop and let it cool. You want polish, not melted edges. Check your resin curing temperature specs to know exactly where your particular resin starts to deform.
- Compound: Apply a small amount of Novus 2 (Fine Scratch Remover) to the buffing wheel. Work each face for five to ten seconds with light pressure. Follow with Novus 1 (Plastic Clean & Shine) on a clean wheel or microfiber cloth.
- Pressure: Let the wheel do the work. Pressing the die into the wheel doesn’t polish faster — it heats faster. Hold the die firmly (it will try to spin out of your fingers) but push with barely more than the die’s own weight.
I learned this the hard way: I once buffed a d20 at 15,000 RPM because I figured faster meant shinier. The face I was polishing went concave — actually dished inward from the heat. That die is now a paperweight and a reminder. Keep it under 8,000 RPM.
The Novus Three-Step System
The Novus plastic polish system is designed exactly for this kind of work:
- Novus 3 (Heavy Scratch Remover): Equivalent to roughly 1500-grit sanding. Use only if you have visible scratches after the Zona progression — it’s not a shortcut past sanding.
- Novus 2 (Fine Scratch Remover): The main polishing compound. This is what goes on your buffing wheel or a folded microfiber cloth. Removes haze and micro-scratches from 2000+ grit sanding.
- Novus 1 (Plastic Clean & Shine): Not an abrasive. It’s a cleaner and protectant. Apply last, by hand, to remove compound residue and add a final gloss.
When Hand Polishing Wins
For dice with inclusions (flowers, foil, glitter), hand polishing is safer. The rotary tool can catch on an inclusion near the surface and tear it out, leaving a crater. If you can see an inclusion within 1 mm of the surface, sand by hand through the entire progression. The extra forty-five minutes is cheaper than re-pouring the set.
UV Resin Coating: The Quick-Gloss Alternative
Not everyone wants to spend an hour per set at the sanding station. UV resin coating offers a shortcut to a glossy finish — but it’s a shortcut with tradeoffs you need to understand.
How It Works
After removing flash and sprue marks and doing a rough sand to about 400 or 600 grit, you brush a thin layer of UV resin (Padico, Bondic, or similar) onto each face. Cure it for two to three minutes under a UV lamp (405 nm wavelength, 36-watt minimum). The cured coating fills micro-scratches and creates a smooth, glossy surface without the full sanding progression.
The Tradeoffs
Pros:
- Takes fifteen to twenty minutes total instead of sixty to ninety
- Creates a uniform gloss even on resin that’s slightly yellowed or hazy
- Good option for opaque dice where internal clarity doesn’t matter
Cons:
- Adds a layer of material, which changes die dimensions slightly — bad for balance-critical work
- The coating can peel or chip over months of heavy use, especially on edges and vertices
- Doesn’t produce the same “depth” as a properly sanded clear die. Light bounces off the coating surface rather than passing through the resin body
- If your resin didn’t cure properly underneath (see resin curing temperature), the UV coat just hides the problem temporarily
Contrarian take: Some sellers on Etsy use UV coating and call it “hand-polished.” It’s not the same thing. A UV-coated die looks great in a photo, but hold it next to a properly sanded die under a desk lamp and the difference is obvious. The sanded die has depth. The coated die has surface shine. Both are valid — but know which one you’re making.
For opaque dice, UV coating is genuinely practical. You don’t need internal clarity, the coating is durable enough for normal play, and the time savings are real. For transparent or translucent dice, sand the full progression. Your customers (or your own collection) will thank you.
Common Polishing Mistakes
After mentoring a few dozen dice makers through their first polishing attempts, the same problems show up over and over. Here’s what to watch for.
Skipping Grits
This is the most common mistake and the hardest to recover from. If you jump from 600 grit to 2000 grit, the 2000-grit paper isn’t aggressive enough to remove the 600-grit scratches. You’ll sand for twenty minutes, see no improvement, and assume something is wrong with the paper or the resin. Nothing is wrong — you just left scratches that are too deep for the finer grit to reach.
Every grit in the progression exists to remove the scratches from the previous grit. Skip one and the chain breaks. If you’re ever unsure whether you sanded enough at a given grit, hold the die under a bright light at a low angle. If you can still see scratch lines running in one direction, stay at that grit.
Too Much Pressure
Pressing harder doesn’t sand faster. It generates heat, loads the paper with resin dust (clogging it), and creates uneven surfaces. On Zona papers especially, heavy pressure tears the paper — and a torn paper edge will gouge a scratch deeper than the grit you’re working with.
Let the abrasive do the cutting. The weight of your hand on the die is enough pressure. If progress feels slow, check that your paper is wet and not loaded with debris. Replace a worn sheet before increasing force.
Heat Damage
Resin is a thermoplastic-adjacent material. It doesn’t melt like wax, but it softens, and a softened surface deforms under even light pressure. Heat damage from aggressive machine polishing shows up as:
- Rounded edges that were once sharp
- A “wavy” surface visible under angled light
- Glossy spots surrounded by matte areas (the gloss is where the resin melted and re-hardened)
If you feel warmth, stop. Dip the die in cool water. Wait thirty seconds. Resume at lower speed or with a lighter touch.
Contamination Between Grits
A single 400-grit particle on your 3000-grit Zona paper will cut a scratch you won’t be able to remove without going back to 2000. Rinse the die, rinse your hands, and work on a clean surface for each grit. Some makers keep each Zona sheet in its own labeled zip-lock bag. That level of organization sounds excessive until you’ve re-sanded a seven-die set because of one stray particle.
Sanding Before Full Cure
If your resin hasn’t fully cured, sanding will tear rather than scratch. The surface gums up, the paper clogs instantly, and you’ll leave a surface that looks worse than when you started. Most epoxy resins need a minimum of 72 hours at room temperature before they’re hard enough to sand. Check the manufacturer’s full-cure time — not the demold time, the full-cure time. For specifics on cure times and temperatures, see our dice making supplies guide.
The satisfaction of holding a finished die — one you poured, demolded, filed, and sanded through ten grits over the course of an hour — is hard to describe to someone who hasn’t done it. The faces catch light like cut glass. The numbers are crisp and ready for inking. The die feels like a real object in a way that raw demolded resin never does.
That’s the payoff. And it’s earned every single time.
Polishing Supplies
Zona 37-948 Polishing Paper Assortment (1-30 Micron)
6 progressive grits from 30µ to 1µ. The gold standard for hand-polishing sharp-edge dice to glass clarity.
Check Price on Amazon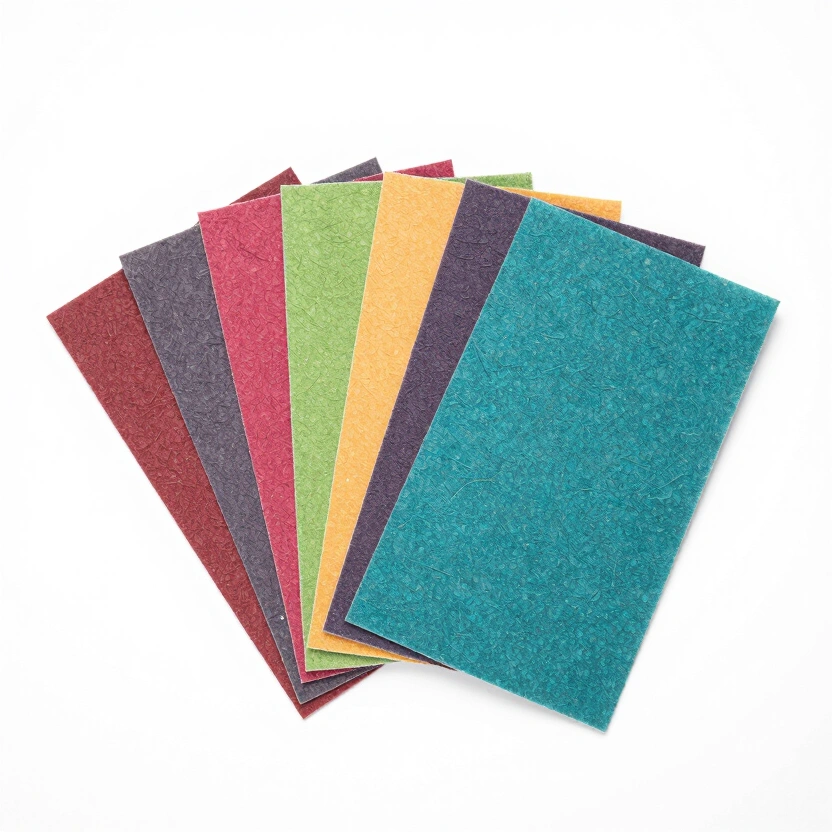
Ultra Fine Wet/Dry Sandpaper (120-10000 Grit)
Wide grit range for resin sanding. Start coarse, work up to mirror finish. 9x3.6 inch sheets.
Check Price on Amazon* Affiliate links. Prices last updated March 6, 2026.
Frequently Asked Questions
How long does it take to polish a full set of seven dice?
Plan for sixty to ninety minutes if you’re hand-sanding through the full Zona progression (400 to 12000 grit). A d4 takes less time because of fewer faces; a d20 takes more. With practice, you’ll get faster — experienced makers report forty-five to sixty minutes per set. Machine finishing the final grits with a Dremel and Novus compound can shave fifteen to twenty minutes off that total.
Can I use regular sandpaper instead of Zona papers?
You can use standard wet/dry automotive sandpaper for the coarser grits (400 through 1000). Above 1000, hardware-store sandpaper becomes inconsistent — the grit particles vary in size and leave unpredictable scratch patterns. Zona papers and Micro-Mesh pads are manufactured to tighter tolerances. The difference shows above 2000 grit, where consistency is everything.
Do I need to polish all faces, including the ones that look fine out of the mold?
Yes. Even faces that look smooth out of the mold have a microscopic texture from the silicone. This texture scatters light differently than a polished face. If you polish five faces and skip two, the inconsistency is visible under any direct light source. Sand every face, every grit, every time.
Why does my die look clear at 5000 grit but go cloudy again at 8000?
You’re likely contaminating the finer paper with particles from a coarser grit. Rinse the die thoroughly between steps, wipe it with a clean microfiber cloth, and make sure your work surface is free of sanding debris. If the problem persists, the 5000-grit step may not have fully removed the 3000-grit scratches — go back to 3000, sand all faces again, then proceed.
Is UV resin coating “cheating”?
No — it’s a different technique with different results. UV coating is practical for opaque dice, batch production, or dice you’re making for personal use. For clear or translucent dice intended for sale, hand-polished clarity is the standard that buyers expect. Choose the method that matches your purpose, not someone else’s opinion on what counts as “real” finishing.
Related Articles
How to Sand Resin Dice: The Complete Grit Progression Guide
Master the 400-to-12000 grit sanding progression for resin dice. Zona papers, wet sanding technique, and the mistakes that keep your dice cloudy.
Wet Sanding Resin Dice: Why Water Makes All the Difference
Learn the wet sanding technique for resin dice — water temperature, dip-and-sand method, paper choices, and the mistakes that leave your finish hazy.
Sharp Edge Dice: Why They Cost More and How to Make Them
Most dice makers overcomplicate sharp edges. The real secret is patience, flat surfaces, and knowing when to stop sanding. Here's the full process.