How to Make Dice Molds: Cap Molds, Sprue Molds, and Everything Between
82% of first molds fail at silicone choice or mold box design. Step-by-step guide to making dice molds with exact cure times, Shore hardness data, and tested methods.
Contents
Ever stared at a bought mold and thought, “I could make this myself”? You can. And once you understand what separates a mold that lasts 200 pours from one that tears on the fifth demolding, you’ll never look at a $40 mold listing the same way again.
Making your own dice molds gives you control over cavity shape, silicone firmness, parting line placement, and mold geometry that no off-the-shelf option can match. Whether you want custom polyhedral shapes, oversized D20s, or molds tuned to your exact pressure pot setup, this is where you take ownership of the process.
Here’s how to do it right.
Cap Molds vs. Sprue Molds: Choosing Your Mold Style
Before you measure a single gram of silicone, you need to decide which mold architecture you’re building. The choice affects every step that follows.
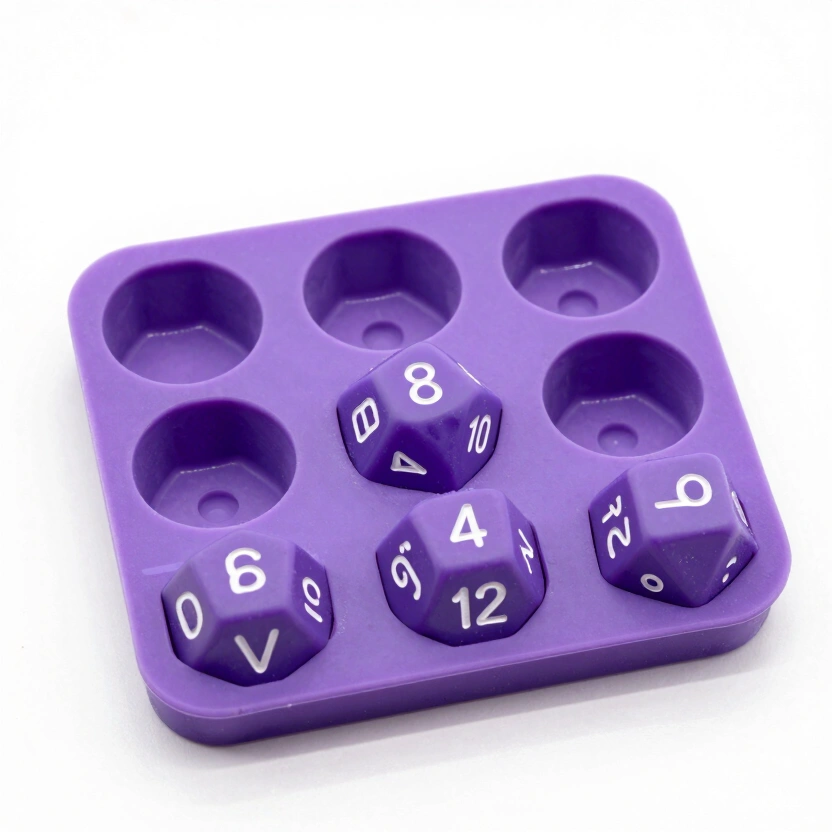
Sprue Molds
A sprue mold is a single block of silicone with die-shaped cavities and a pour channel — the sprue — leading from the top surface down into each cavity. You pour resin through the sprue, let it cure, and flex the silicone to pop the finished die out. The cured sprue leaves a nub on one face that you cut and sand flush.
I made my first mold as a sprue mold, and honestly, that was the right call. The single-piece design means no alignment issues, no registration keys to engineer, and no two-part sealing problems. Air escapes naturally through the open sprue during the pour. If you’re making molds for the first time, start here.
Pros: Simpler construction, forgiving of small errors, easier demolding, lower silicone usage (one piece instead of two).
Cons: Every die needs sprue removal and face sanding. Parting lines are harder to control. Not ideal for sharp-edge dice.
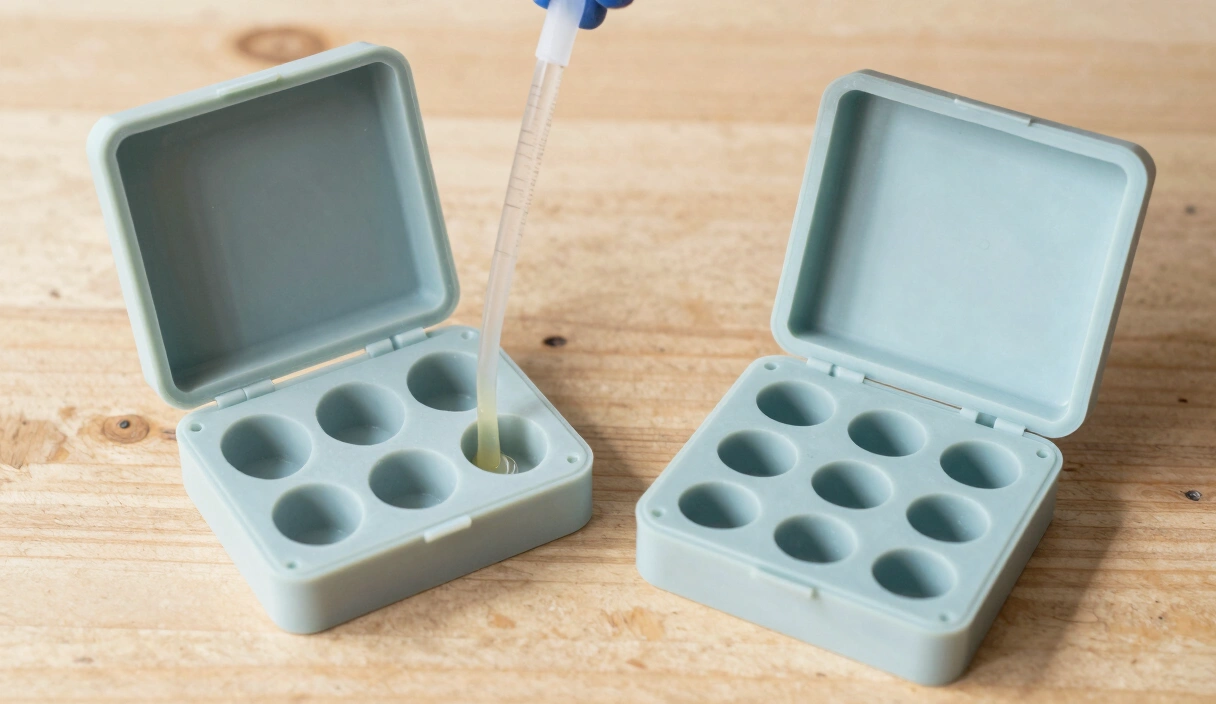
Cap Molds
A cap mold uses two pieces: a body with die cavities and a matching cap that seals the top face of each die. You pour resin into the body, wait for it to reach a partial gel state, then press the cap on. The cap forms the final face under compression — no sprue, minimal flash, and crisp edges on every face.
Pros: No sprue removal, cleaner parting lines, sharper face definition. The standard for sharp-edge dice.
Cons: Requires precise alignment keys between halves. Two separate silicone pours to make one mold. Timing the cap placement takes practice — too early and resin squeezes out, too late and it won’t conform.
When to Use Each
Building your first mold? Make a sprue mold. Scaling up to sharp-edge sets you plan to sell? Cap mold. Want both? Many makers keep a sprue mold for testing new resin colors and a cap mold for production pours. There’s no rule that says you pick one forever.
Choosing Your Silicone
Silicone selection is where most DIY mold projects succeed or fail. Three variables matter: Shore hardness, pot life, and brand reliability.
Shore Hardness
Shore A hardness measures how firm the cured silicone feels. For dice molds, the practical range is 15A to 30A.
Shore 15A (soft): Easy demolding — the silicone flexes enough to release even complex geometries without tearing. The trade-off is durability. Soft molds distort slightly under 40 PSI in a pressure pot, which can produce dice with subtly warped faces. Expect 80-150 pours before the cavities degrade noticeably.
Shore 30A (firm): Holds shape under pressure, captures sharper detail, and lasts 200-400 pours. Demolding requires more force, so you need clean draft angles on your masters. Thin mold walls at Shore 30A can crack rather than flex.
Maker’s Note: I started with Shore 15A because everyone recommended it for beginners. They were right — but I switched to Shore 30A within three months because my dice edges kept coming out soft under pressure. If you own a pressure pot already, go straight to 30A.
There’s something genuinely satisfying about flexing a well-made 30A mold and watching a die pop free with edges sharp enough to catch light. That moment when the geometry is perfect and the silicone releases clean — it doesn’t get old.
Pot Life
Pot life is the working time between mixing and when the silicone begins to thicken. Short pot life (6-8 minutes) means you need to mix, degas, and pour fast. Long pot life (45+ minutes) gives you room to work carefully.
For dice molds, 30-45 minutes of pot life is ideal. Enough time to degas properly, pour slowly, and fix problems before the silicone sets.
Recommended Brands
Mold Star 15 (Smooth-On): Shore 15A, 50-minute pot life, 4-hour cure. The community default for beginners. Pours thin, captures detail well, and forgives sloppy mold boxes. About $30 per kilogram.
Mold Star 30 (Smooth-On): Shore 30A, 45-minute pot life, 6-hour cure. The upgrade path. Firmer, more durable, holds up under pressure casting. Same price as Mold Star 15.
Dragon Skin (Smooth-On): Shore 10A to 30A depending on variant. Extremely tear-resistant — the highest tear strength in the Smooth-On lineup. Overkill for most dice molds, but ideal if you’re making molds with thin walls or complex undercuts.
OOMOO 30 (Smooth-On): Shore 30A, no mixing by weight required — it’s 1:1 by volume. The easiest silicone to use. The trade-off: shorter lifespan (100-150 pours) and less detail capture than the Mold Star line. Good for prototyping, not great for production molds.
Making a Master Die
Your mold is only as good as the master it’s cast from. Every surface imperfection, layer line, and fingerprint transfers directly into the silicone — and then into every single die you pour from that mold.
3D Printed Masters
The most common approach. A resin 3D printer (SLA or MSLA) produces masters with layer lines fine enough to disappear after light sanding. FDM printers work too, but the layer lines require significant post-processing.
Print settings that matter: 0.025 mm layer height on an SLA printer gives you surfaces that need only 800-grit sanding and a coat of clear spray to become mold-ready. At 0.05 mm, you’ll need to start at 400 grit. FDM at 0.1 mm needs filler primer and hours of sanding — possible, but tedious.
Sand your prints through 1500 grit, then hit them with two coats of gloss clear coat. The clear coat fills micro-scratches and creates the mirror-smooth surface your mold cavities need.
Bought Masters
Companies like Dice Dungeons and several Etsy sellers offer precision-machined or high-resolution printed masters specifically designed for mold making. These run $15-40 per set and arrive ready to mold — no sanding, no coating. If you don’t own a 3D printer, this is the fastest path to a quality mold.
Clay Sculpted Masters
The old-school method. Polymer clay (Sculpey, Fimo) shaped by hand or with basic tools, then baked to harden. Realistic for D6s and maybe D4s, but sculpting a geometrically accurate D20 by hand is an exercise in frustration. I tried it once. The icosahedron I made looked like a potato that had been through an argument.
Reserve clay sculpting for novelty dice, custom shapes, or masters where geometric perfection isn’t the goal.
Building the Mold Box
The mold box contains the silicone while it cures around your masters. It needs to be leak-proof, the right size, and easy to disassemble after curing.
The LEGO Method
The dice-making community’s favorite approach, and for good reason. LEGO bricks snap together into watertight boxes of any dimension, disassemble instantly for demolding, and reuse indefinitely.
Build your box with walls at least 0.5 inches (13 mm) from the nearest master on all sides, and 0.5 inches of silicone above the tallest master. For a 7-die polyhedral set arranged in a grid, a box roughly 6 x 4 x 2 inches (150 x 100 x 50 mm) works well.
Hot-glue your masters to the LEGO baseplate face-down (for sprue molds) or suspended on rods (for cap molds). The glue peels off the masters after demolding without leaving residue.
Contrarian take: Some guides recommend elaborate wooden mold boxes with screws and clamps. For production work at scale, sure. For making dice molds at home, LEGO beats everything. It’s cheaper, faster, infinitely adjustable, and you probably already own some.
Foam Board
Dollar-store foam board cut to size, sealed at the edges with hot glue. Lightweight, disposable, and costs almost nothing. The downside: foam board flexes under the weight of silicone, which can produce molds with slightly bowed walls. Fine for small single-die molds, unreliable for full sets.
Acrylic Box
Laser-cut or hand-cut acrylic panels glued with silicone caulk. Rigid, reusable, and transparent — you can watch the silicone fill and spot air pockets in real time. The build takes longer than LEGO, but if you’re making molds regularly, a set of acrylic panels pays for itself in convenience.
Picture this: you’ve built your LEGO box, glued down seven polyhedral masters in a clean grid, and the whole assembly sits on your workbench looking like a tiny architectural model. That’s the moment right before the pour — and it’s the last time those masters exist outside of silicone.
Pouring and Curing the Silicone
This is where the mold actually gets made. Precision here determines whether you get 50 pours or 300 from the finished mold.
Mixing
Weigh Parts A and B on a digital scale accurate to 0.1 grams. Most platinum-cure silicones mix 1A:1B by weight, but check your specific product — Mold Star is 1:1, Dragon Skin is 1:1, OOMOO 30 is 1:1 by volume (not weight). Getting this wrong produces silicone that never fully cures, leaving you with a sticky, unusable mold and wasted masters.
Stir slowly for 3 minutes, scraping the sides and bottom of the cup. Fast stirring whips in air you’ll have to remove later.
Degassing
Mixed silicone is full of trapped air. If you pour it as-is, those bubbles cure into the mold walls and transfer as bumps onto every die you make.
A vacuum chamber is the proper tool. Place your mixing cup inside, pull vacuum to 29 inches of mercury, and watch the silicone rise, foam, and collapse as the air evacuates. Two cycles of 3-5 minutes each removes virtually all trapped air.
No vacuum chamber? Pour from high. Hold the cup 12-18 inches above the mold box and pour in a thin, steady stream. The thin stream breaks bubbles as the silicone stretches. It’s not as effective as degassing, but it’s the best no-equipment alternative.
Pouring
Pour into the lowest corner of the mold box, not directly onto the masters. Let the silicone flow across the baseplate and rise around the masters gradually. This pushes air ahead of the silicone front rather than trapping it against the master surfaces.
Fill until silicone covers the tallest master by at least 0.5 inches (13 mm). For cap molds, pour the body half first, let it fully cure, then remove the masters, apply mold release to the cured surface, reposition the masters, and pour the cap half.
Cure Times
Mold Star 15: 4 hours at 73 degrees Fahrenheit (23 degrees Celsius). Mold Star 30: 6 hours. Dragon Skin 30: 16 hours. OOMOO 30: 6 hours.
These are minimums. I always wait an extra 2 hours beyond the listed cure time before demolding. Silicone that’s 95% cured tears more easily than silicone that’s fully crosslinked.
Demolding
Disassemble your mold box first — peel away the LEGO walls, remove the baseplate. Then flex the silicone gently from the edges, working the masters free without pulling straight up. Pulling straight up on a D20 master creates stress concentrations at the vertices that can tear thin silicone walls.
After demolding, let the mold sit uncovered for 24 hours before your first resin pour. This allows residual cure byproducts to off-gas. Pouring resin into a freshly demolded mold can cause inhibition — the resin surface stays tacky where it contacts incompletely cured silicone.
That first moment when you flex back the silicone and see a perfect D20 cavity staring back at you, every face sharp, every number legible — it’s hard not to grin.
Mold Maintenance and Lifespan
A well-maintained silicone mold outlasts a neglected one by a factor of three or more. The effort is minimal, but the payoff is real.
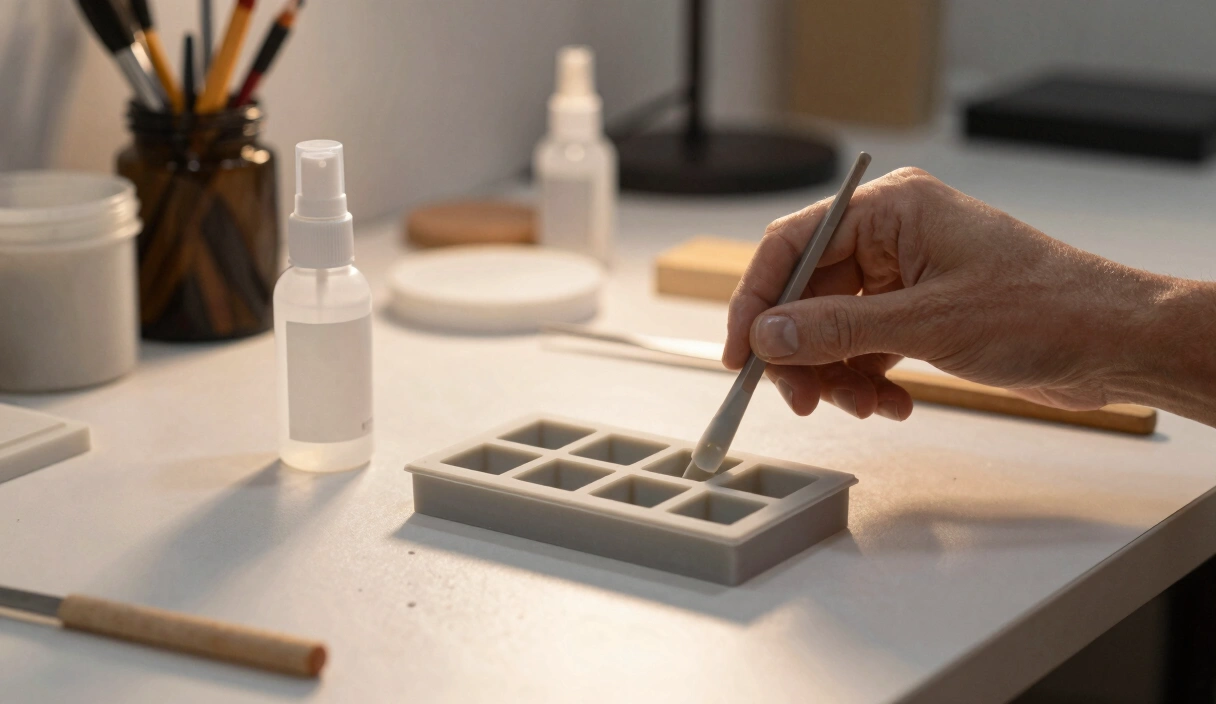
Mold Release
Apply a thin coat of mold release spray (Mann Ease Release 200 or Smooth-On Universal Mold Release) before every pour. This does two things: prevents resin from bonding to damaged spots in the silicone, and makes demolding easier — which reduces the mechanical stress that degrades mold cavities over time.
One spray, a 10-second wait for the carrier solvent to flash off, then pour. That’s it.
Storage
Store molds flat, not stacked, in a cool drawer away from direct sunlight. UV exposure degrades platinum-cure silicone over months, making it brittle and prone to tearing. Temperature extremes cause dimensional changes — a mold stored in a hot garage produces dice that are measurably different from ones made in an air-conditioned room.
If you’re stacking molds to save space, place a sheet of parchment paper between them. Silicone sticks to silicone over time under its own weight.
When to Replace
Replace a mold when you see any of these: torn cavity walls that leave flash lines on your dice, surface texture degradation that makes dice come out matte instead of glossy, or dimensional distortion where dice no longer sit flat on a surface.
For Mold Star 30 at Shore 30A with mold release used consistently, expect 200-400 pours. Mold Star 15 at Shore 15A gives 80-150. OOMOO 30 tops out around 100-150.
Track your pour count. A simple tally mark on a sticky note attached to each mold saves you from the frustration of diagnosing resin dice problems that turn out to be worn mold issues.
Recommended Dice Molds
LET'S RESIN Polyhedral Dice Mold Set (7 Shapes)
Stereoscopic 7-piece silicone mold for D4-D20. Pre-made sprue channels. Top-selling beginner mold.
Check Price on Amazon
CZYY Sharp Edge Dice Mold (7 Shapes)
Precision slab-style molds for sharp-edge dice. Popular on r/DiceMaking. Requires careful demolding.
Check Price on Amazon* Affiliate links. Prices last updated June 22, 2026.
FAQ
How much does it cost to make a dice mold at home?
Budget $25-45 for silicone (enough for one 7-die mold), $15-40 for masters (printed or bought), and $0-15 for a mold box (LEGO or foam board). Total: $40-100 for your first mold, dropping to $25-45 per mold after that since you reuse masters and mold boxes.
Can I use food-grade silicone to make dice molds?
Technically yes, but food-grade silicones are formulated for flexibility and safety, not detail capture or durability under pressure. They’re typically Shore 10A-15A, which is too soft for pressure casting. Stick with mold-making silicones — Mold Star, Dragon Skin, or OOMOO — designed for this exact application.
How many dice can I pour from one homemade mold?
With Mold Star 30 (Shore 30A) and consistent mold release use, expect 200-400 pours before cavity degradation affects dice quality. Softer silicones like Mold Star 15 give 80-150 pours. Your demolding technique matters as much as the silicone — rough handling halves the lifespan.
Do I need a vacuum chamber to make dice molds?
A vacuum chamber significantly improves mold quality by removing trapped air from the mixed silicone. Without one, you’ll have small bubbles in the mold walls that transfer as surface bumps onto your dice. The high-pour technique (pouring from 12-18 inches) helps but doesn’t fully replace degassing. If you’re making molds regularly, a vacuum chamber ($100-150) pays for itself in mold quality within two or three builds.
This weekend, pick one mold style — sprue if you’re starting out, cap if you’ve already made a few sets of dice — and build it. One mold, seven cavities, your choice of silicone. Pour it, cure it, demold it, and run a single resin test through the result. That first pour from a mold you made yourself hits different than anything you’ve bought. And once you’ve done it once, you’ll start seeing mold geometry everywhere — in ice cube trays, in chocolate molds, in anything with a cavity and a parting line. Welcome to the next level of how to make dice.
Related Articles
Silicone Dice Molds: Sprue vs. Cap, Which Brands to Trust, and What to Avoid
Sprue molds or cap molds? NanoLabMaker or House of Molds? Here's the practical guide to choosing the right silicone dice mold for your skill level and goals.
Best Mica Powder for Resin Dice: 4 Brands Tested Side by Side
Tested four mica powder brands in resin dice pours. Honest comparison of particle size, color range, and value so you pick the right one first.
Best Resin for Dice Making: 5 Brands Tested and Ranked
I poured dice with five different resins so you don't waste money guessing. Honest pros, cons, and a clear winner for every budget.