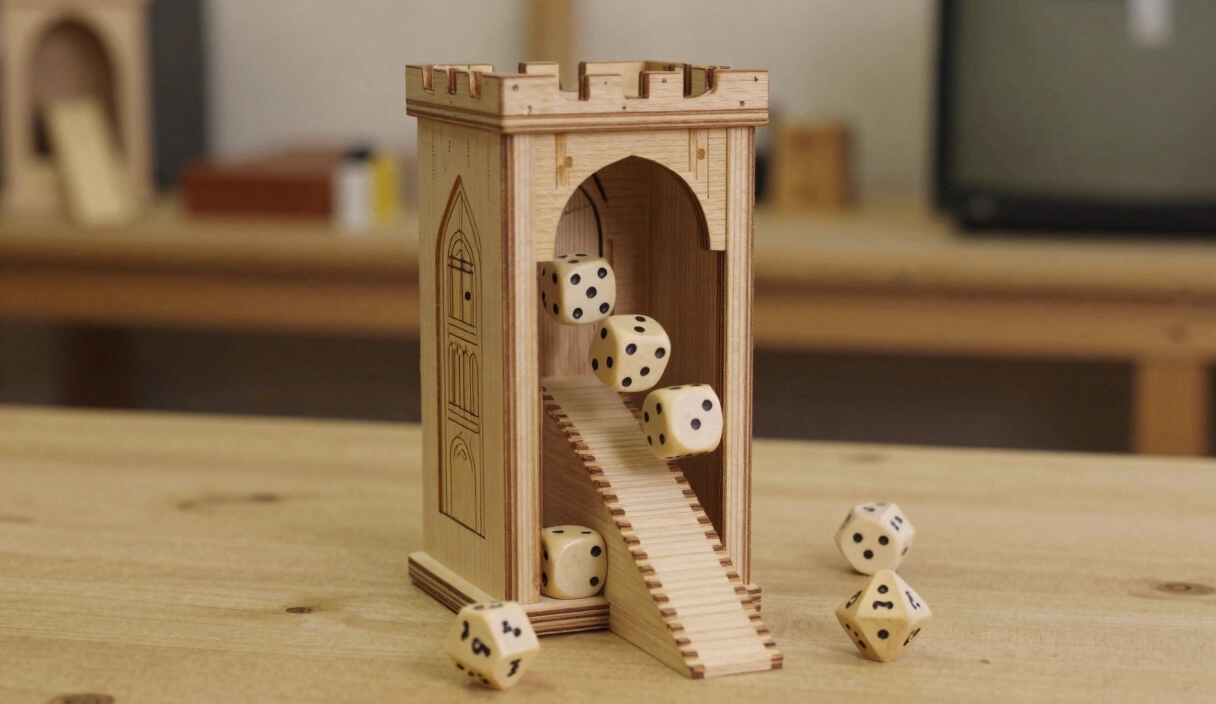
DIY Dice Tower: 4 Builds from Cardboard to Resin
Four dice tower builds ranked by skill and budget — from a free cardboard tower in 30 minutes to a resin masterpiece that matches your handmade dice set.
Contents
A standard polyhedral die dropped from five inches hits the table at roughly 4.5 miles per hour. That’s enough force to scatter across the table, knock over miniatures, and roll off the edge into the Bermuda Triangle between couch cushions. A dice tower — basically a vertical chute with angled baffles — converts that chaotic energy into a controlled tumble that lands every die in the same spot, every time.
Here’s what most people don’t realize: you can build one in thirty minutes from a cereal box, or you can spend a weekend crafting a resin tower that matches the dice you poured yourself. Same physics, wildly different aesthetics. Four builds follow, from zero dollars to “I have a resin workshop and I’m not afraid to use it.”
Cardboard Dice Tower (Beginner — $0-5, 30 Minutes)
This is where everyone should start. Seriously. Before you cut a single piece of wood or queue up a print file, build the cardboard version. It teaches you how baffles work, how landing zone size affects bounce-out, and whether you even like using a tower at your table.
Maker’s Note: I built my first tower from an Amazon shipping box the night before a one-shot. It was ugly. It also worked perfectly, and I used it for three months before building anything fancier.
Materials
- One corrugated cardboard box (cereal box works, shipping box is sturdier)
- Ruler or straight edge
- Box cutter or craft knife
- Hot glue gun or white glue
- Masking tape (optional, for reinforcement)
Dimensions
Cut your tower body to 4 inches (10 cm) wide by 10 inches (25 cm) tall. The landing tray extends 4 inches (10 cm) out from the base and should have walls at least 1 inch (2.5 cm) high to catch dice.
Step-by-Step
Step 1: Cut the tower body. You need a rectangular tube — four walls forming a 4-inch by 4-inch (10 cm by 10 cm) square channel, 10 inches (25 cm) tall. Score the cardboard along fold lines with the back of your blade for clean bends. Glue or tape the seam shut.
Step 2: Cut three baffles. Each baffle is a 4-inch by 3-inch (10 cm by 7.5 cm) rectangle. These are the angled shelves inside the tower that the dice bounce off. Three baffles is the sweet spot — two gives too straight a drop, four causes jams with larger dice.
Step 3: Mount the baffles. Alternate sides: first baffle angles left-to-right, second right-to-left, third left-to-right. Each baffle tilts at roughly 45 degrees. Hot glue works fastest here. Leave at least 2 inches (5 cm) between each baffle so a d20 doesn’t get wedged.
Step 4: Build the landing tray. Cut a flat base 4 inches by 8 inches (10 cm by 20 cm). Fold up 1-inch (2.5 cm) walls on three sides. The tower sits at the back edge, open side facing forward. Glue the tower body to the tray.
Step 5: Test with a full set. Drop a d4, d6, d8, d10, d12, and d20 through individually. If any die gets stuck, increase the gap between baffles. If dice bounce out of the tray, raise the tray walls to 1.5 inches (4 cm).
Estimated time: 20-30 minutes. Cost: $0-5, depending on whether you already have a glue gun.
The cardboard version is disposable by design. Its real job is teaching you the geometry before you commit to permanent materials.
Wooden Dice Tower (Intermediate — $15-30, Weekend Project)
Wood gives you permanence, better acoustics, and something that actually looks good on a game table. This build assumes you can make straight cuts and have access to basic tools. No joinery wizardry required — butt joints and wood glue handle everything.
Materials
- 1/4-inch (6 mm) plywood or craft wood panels (hobby stores sell pre-cut 12 x 12 inch sheets)
- Wood glue (Titebond III is waterproof and strong)
- Sandpaper, 120 and 220 grit
- Felt or craft foam sheet (for the landing zone)
- Optional: wood stain or acrylic paint
Tools
- Table saw, miter saw, or hand saw with miter box
- Clamps (at least 4 spring clamps)
- Pencil and combination square
- Drill with 1/16-inch bit (for pilot holes if you add pins)
Dimensions
The tower body: 3.5 inches (9 cm) wide by 3.5 inches (9 cm) deep by 11 inches (28 cm) tall. Baffles: 3.5 inches by 2.5 inches (9 cm by 6.5 cm). Landing tray: 3.5 inches by 7 inches (9 cm by 18 cm) with 1.25-inch (3 cm) walls.
Step-by-Step
Step 1: Cut all panels. You need two side walls at 3.5 by 11 inches, a back wall at 3 by 11 inches, three baffles at 3 by 2.5 inches, and five pieces for the landing tray (base plus four low walls). Sand every edge with 120 grit before assembly — it’s much harder to sand inside a glued box.
Step 2: Mark baffle positions on the side walls. Measure from the top: first baffle at 2.5 inches, second at 5 inches, third at 7.5 inches. Mark a 45-degree angle line at each position. Alternating sides: left wall gets baffles one and three, right wall gets baffle two.
Step 3: Glue baffles to side walls. Apply a thin bead of wood glue along the baffle edge and press it against the marked line on the side wall. Clamp and let each set for 30 minutes before moving to the next. Rushing this step is how you end up with a baffle popping loose on the third session and jamming every roll.
Data Point: A 45-degree baffle angle produces the most randomized rolls. Steeper angles (60 degrees) cause dice to slide rather than tumble. Shallower angles (30 degrees) barely redirect — the die just falls straight through.
Step 4: Assemble the tower body. Glue the back panel between the two side walls. Clamp and wait at least an hour. Leave the front open — that’s where dice exit at the bottom.
Step 5: Build and attach the landing tray. Glue the tray walls to the base. Line the tray floor with adhesive-backed felt or craft foam — this deadens the landing impact and keeps dice from bouncing out. Attach the tower body to the back edge of the tray with glue and clamp overnight.
Step 6: Finish. Sand the exterior with 220 grit. Stain, paint, or leave natural. If you’re painting a design, prime first with a light sanding sealer — bare plywood drinks paint unevenly.
Estimated time: 3-5 hours of work spread over a weekend (glue drying accounts for most of the wait). Cost: $15-30 depending on wood and finish choices.
The satisfaction of hearing dice tumble through a wooden tower you built yourself is hard to overstate. The sound is better than cardboard, the weight feels substantial, and the felt-lined tray produces a soft, authoritative thud on every roll.
3D Printed Dice Tower (Intermediate — Requires Printer Access)
If you own or have access to an FDM printer, a dice tower is one of the most practical prints you’ll run. No supports needed on most designs, large flat surfaces for good bed adhesion, and the community has already designed hundreds of free STL files ranging from simple chutes to dragon skulls and castle turrets.
What You Need
- FDM 3D printer with at least a 200 x 200 mm build plate (Ender 3, Prusa MK series, Bambu Lab A1 — any of these work)
- PLA filament (1 roll is more than enough)
- Slicing software (Cura, PrusaSlicer, OrcaSlicer)
- STL file — sources below
Where to Find STL Files
- Thingiverse — Search “dice tower.” Hundreds of free options. Sort by “Makes” to find the designs people actually print successfully.
- Printables (Prusa) — Generally higher-quality uploads with better documentation. Look for designs with printed-in-place baffles to skip assembly.
- MyMiniFactory — Mix of free and paid. The paid designs ($2-8) tend to have better baffle geometry and tested dimensions.
Recommended Print Settings
| Setting | Value |
|---|---|
| Layer Height | 0.2 mm (standard quality) |
| Infill | 15-20% (structural, not solid) |
| Wall Count | 3 (strong enough, not wasteful) |
| Supports | None for most tower designs |
| Print Time | 6-12 hours depending on size |
| Filament Used | ~100-180 g |
Step 1: Download and slice. Import the STL into your slicer. Orient it so the tallest dimension runs vertically. Check the preview layer by layer — if you see unsupported overhangs beyond 55 degrees, enable support for those areas only.
Step 2: Print. Use a clean, leveled bed. PLA at 200-210°C nozzle, 60°C bed. A brim helps if the tower footprint is narrow.
Step 3: Post-process. Remove any stringing with a heat gun held 6 inches away for 2-3 seconds per area. Sand contact surfaces lightly with 220 grit if dice are catching on layer lines. Some makers line the baffle surfaces with adhesive felt to reduce noise and prevent dice from chipping.
Warning: Do not use ABS for a dice tower unless you have a fully enclosed printer with ventilation. The warping on tall prints is brutal, and the fumes are not worth it for a table accessory. PLA is strong enough — it’s not load-bearing.
Step 4: Optional — paint. PLA takes acrylic paint well after a light scuff with 400-grit sandpaper. Spray primer first, then hand-paint details. A matte clear coat prevents paint chips from dice impacts.
Estimated time: 1-2 hours of active work plus print time. Cost: $3-8 in filament plus STL cost (if any).
The frustration with 3D printed towers usually comes from noise. PLA on PLA is loud. Felt strips on the baffles and a foam-lined landing tray solve this completely. Two dollars of craft foam transforms a clacky plastic chute into something table-friendly.
Resin Dice Tower (Advanced — $40-80, Leverages Existing Skills)
If you already make resin dice, you have 90% of the skills and materials needed to build a tower that matches your sets. This is where dice making supplies pull double duty — the same pigments, molds, and techniques translate directly.
This build is not for beginners to resin. You need to be comfortable with large pours, exothermic management, and demolding rigid shapes. If you haven’t worked with resin yet, start with learning how to make dice first.
Materials
- Epoxy resin (your usual casting resin works — ArtResin, Alumilite Amazing Clear, or similar)
- Silicone for mold making (Mold Star 15 or 20 — you’ll make a custom mold)
- Pigments, mica powders, alcohol inks
- A master form (3D print or carved foam)
- Release agent
- Mixing cups, stir sticks, nitrile gloves, P100 respirator
Tools
- Pressure pot (for bubble-free panels, if casting thick sections)
- Heat gun
- Sandpaper progression: 400, 800, 1200, 2000 grit
- Plastic polish (Novus 2 or similar)
Approach: Panel Casting vs. Open Pour
Two paths here. Panel casting means pouring flat resin panels in simple rectangular silicone molds, then assembling the cured panels into a tower with resin as adhesive. This is more predictable and works well in a pressure pot. Open pour means creating a silicone mold of the entire tower shape and filling it in one shot — impressive, but the volume of resin generates serious heat, and the demolding is tricky.
Panel casting is what I recommend. Here’s why: a full tower mold uses 300-500 ml of resin in a single pour. The exothermic reaction in a volume that large can hit 350°F (175°C) internally, which yellows the resin and can crack the silicone mold. Panels keep each pour under 80 ml, well within safe thermal limits.
Step-by-Step (Panel Method)
Step 1: Make a silicone panel mold. Build a simple rectangular mold box from foamcore — inner dimensions of 5 by 12 by 0.25 inches (13 by 30 by 0.6 cm). Mix and pour your silicone. You only need one mold; you’ll pour panels in batches. Cure time is typically 4-6 hours for Mold Star 15.
Step 2: Pour your resin panels. Mix resin per manufacturer ratios. Add pigment, mica, or inclusions. Pour into the silicone mold and pressure-cure at 40 PSI for the full cure time — usually 24 hours for epoxy. You need six panels minimum: two sides, one back, and three baffles. Cut them to final dimensions after curing using a fine-tooth hobby saw or rotary tool with a cutting disc.
Step 3: Sand panel edges. Flat, even edges are critical for clean joints. Work through 400, 800, and 1200 grit on each joining edge. Check flatness against a known-flat surface like a granite tile or glass plate.
Step 4: Assemble with resin adhesive. Mix a small batch of clear resin. Apply a thin layer to joining edges, press panels together, and hold with masking tape or clamps. Cure under pressure if possible — but at these thin joint lines, ambient cure usually produces an invisible bond.
Step 5: Add baffles. Same technique — resin adhesive, 45-degree angle, alternating sides. Hold each baffle in position with tape until the resin grabs, about 90 minutes for most epoxies.
Step 6: Build and attach the landing tray. Pour a flat tray base, build low walls from resin strips, and attach to the tower. Line the tray floor with matching felt or leave it bare resin for a glass-smooth rolling surface.
Step 7: Final polish. Sand the exterior through 2000 grit and buff with plastic polish. The result should be a glossy, translucent tower that catches light like a display piece.
Honesty Check: A resin tower takes 40-60 hours from first silicone pour to final polish, spread over 2-3 weeks of cure cycles. It is not a weekend project. The materials cost $40-80 on top of what you already own. The result is stunning and entirely unique — but go in with realistic expectations about the time commitment.
Estimated time: 40-60 hours (including cure times). Cost: $40-80 in consumables.
Design Principles: What Makes a Dice Tower Actually Work
Whether you built from cardboard or resin, the physics are identical. Three variables determine whether your tower produces satisfying, randomized rolls or frustrating jams and bounce-outs.
Baffle Angle and Count
The baffles do all the work. Each one redirects the die’s momentum, adding rotation and unpredictability. Three baffles at 45 degrees is the tested standard for polyhedral dice. The die contacts each surface at a different angle, ensuring that the starting orientation doesn’t predict the result.
Fewer than three baffles and you lose randomization — dice tend to slide through and land on the same face they entered. More than four baffles and d4s start jamming. Three is the number.
Landing Zone Dimensions
The landing tray needs to be large enough that a d20 doesn’t bounce out, but compact enough for a game table. A 4-inch by 6-inch (10 cm by 15 cm) tray with 1-inch (2.5 cm) walls handles a full polyhedral set dropped simultaneously. If you only ever roll one die at a time, you can go smaller — 3 by 4 inches (7.5 by 10 cm) works.
Wall height matters more than floor area. A 0.75-inch (2 cm) wall lets d20s escape regularly. Go 1.25 inches (3 cm) minimum.
Noise Dampening
A bare wood or plastic tower is loud. At a quiet table, it’s fine. At a game store with six tables running simultaneously, the clatter gets old fast.
Solutions, ranked by effectiveness:
- Adhesive-backed felt on baffles and tray floor — cheapest, most effective, $2-3 for a full sheet
- Craft foam liner — slightly thicker, absorbs more impact, good for tray floors
- Cork sheet on the tower base — prevents the whole structure from resonating against the table
- Rubber feet — four stick-on bumper pads isolate vibration for about a dollar
The felt-on-baffles approach drops volume by roughly half without affecting roll randomization. It’s the single best upgrade for any tower, regardless of material.
Dice Accessories

KISREL DND Dice Mold + Organizer Box
All-in-one: 7 dice cavities plus a storage box mold. Perfect starter gift for aspiring dice makers.
Check Price on Amazon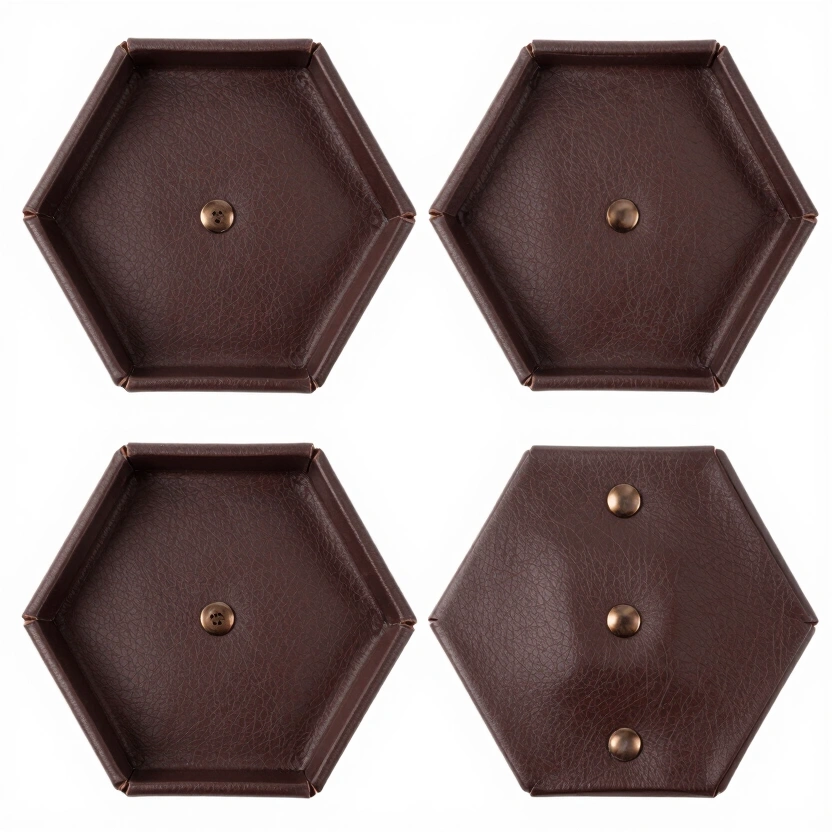
Folding Leather Dice Tray (Hexagonal)
Premium PU leather dice tray. Snaps flat for storage. Protects dice and tables during play.
Check Price on Amazon* Affiliate links. Prices last updated March 6, 2026.
FAQ
What size should a dice tower be?
Standard dimensions that work for all polyhedral dice: 10-12 inches (25-30 cm) tall, 3.5-4 inches (9-10 cm) wide internally. The landing tray should extend at least 4 inches (10 cm) from the tower base with walls of 1-1.25 inches (2.5-3 cm). Shorter towers don’t give dice enough contact with baffles to randomize properly. Wider is fine but wastes table space.
Do dice towers actually randomize rolls?
Yes, provided the tower has at least three baffles at approximately 45 degrees. Each baffle contact introduces a new rotational axis. A 2019 analysis by a probability hobbyist on Reddit tested 1,000 rolls through a three-baffle tower and found no statistically significant bias across any face of a d20 (chi-squared test, p > 0.85). The randomization comes from the multiple redirections, not from the drop height.
Can I use a dice tower for metal dice?
You can, but protect the baffles. Metal dice weigh 3-5 times more than resin or acrylic dice, and they will dent wooden baffles and crack 3D printed ones over time. Line all contact surfaces with felt or rubber. For a resin tower, consider casting thicker baffles — 3/8 inch (10 mm) instead of 1/4 inch (6 mm) — to absorb the extra impact energy without cracking.
How do I make a collapsible dice tower for travel?
The simplest approach: build a tower from three interlocking sections that stack for transport. Design each section as a 4-inch (10 cm) tall segment with alignment tabs or magnets embedded in the top and bottom edges. Neodymium magnets (6 mm diameter, 3 mm thick) press-fit into drilled holes work exceptionally well. The tower assembles in seconds and breaks down to a flat stack that fits in a dice bag. This works in wood, resin, or 3D printed PLA.
A die hits the table at 4.5 miles per hour. With a tower, it hits felt at a controlled tumble — no scattered miniatures, no lost dice behind the bookshelf, no arguments about cocked rolls. The thirty-minute cardboard version proves the concept. Everything after that is just making it beautiful.
Related Articles
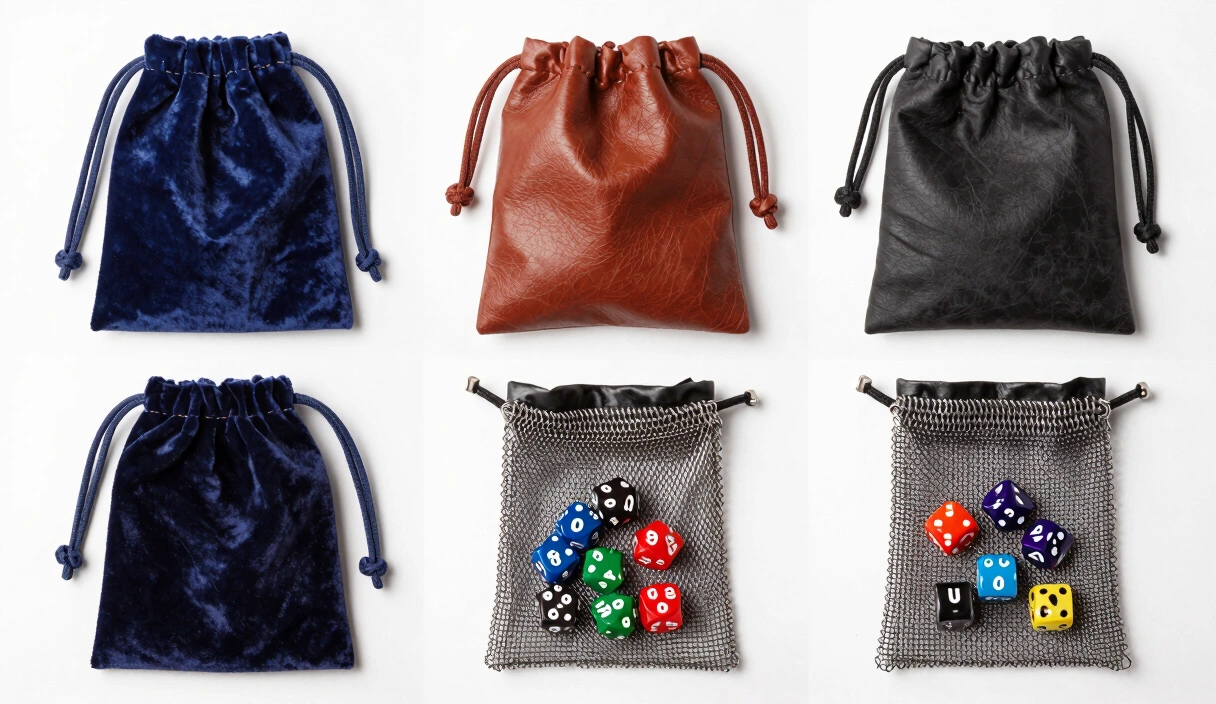
Best Dice Bags: From Crown Royal Pouches to Custom Leather
Comparing drawstring pouches, segmented bags, roll-ups, and hard cases for dice storage. Real picks with prices, plus a 30-minute DIY dice bag tutorial.
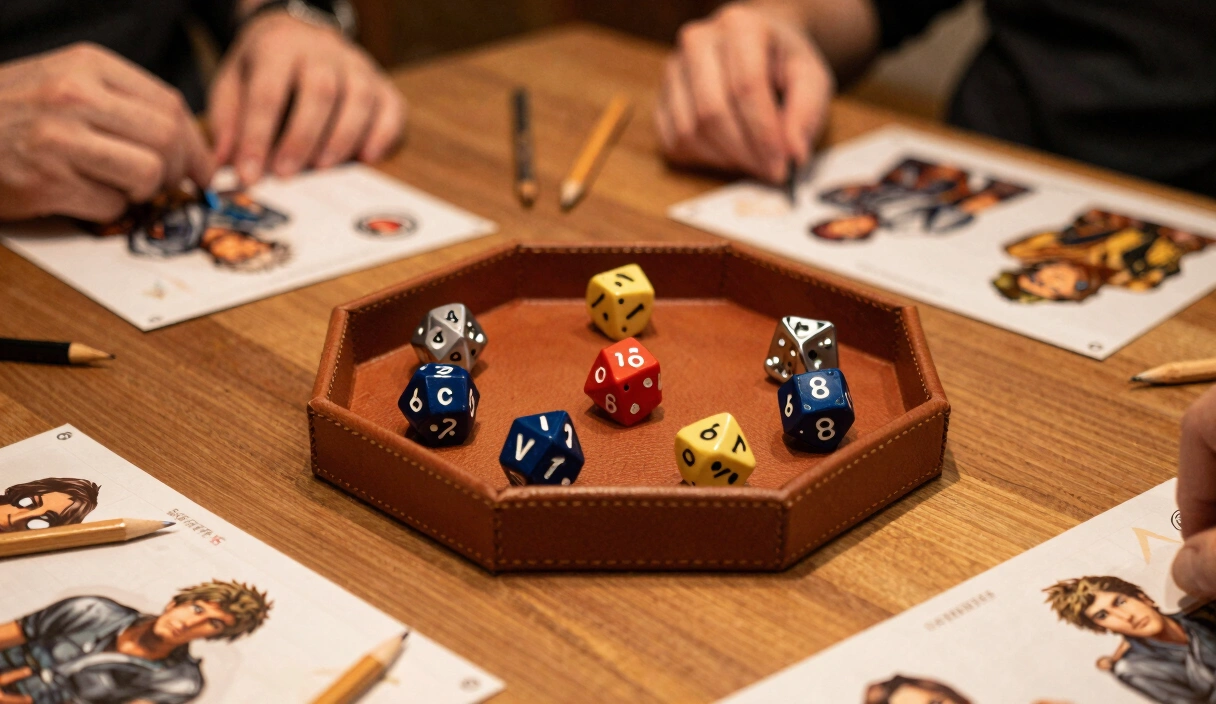
Best DnD Dice Trays: From $10 Folding to Handmade Leather
Your dice deserve better than the floor. We compare folding, wooden, and handmade leather dice trays by price and durability — plus three DIY builds.
Dice Vaults: Premium Storage for Dice That Deserve Better Than a Bag
Your $80 gemstone dice are rattling loose in a Crown Royal bag. A dice vault fixes that — we compare Wyrmwood, Die Hard, 3D printed, and DIY options.